
I don’t know about you, but I’ve had the desire to make something out of wood pallets for years. If you look in the right places, you can find them either free or very in expensive.
For me, I found my first set simply driving down the road. It was only a few months after we moved to Texas and I kept driving by two places that had stacks of wood pallets out front. I knew I wanted to do something with wood pallets but I didn’t know what at the time. I’m inherently a introvert so it took me some time to gather up my courage and inquire about the pallets and once I did, I wasn’t disappointed. One place was a home that was getting rid of them, so they were free! Another place was a co-op type place that sold feed and tools for farmers. They sold their wood pallets for $4 per pallet. Naturally, I went with the free ones. 🙂
What You Will Need
- Wood pallets
- 2x4s
- Miter saw & power drill
- Screws
- Paint (whatever color you want, I just used white I had laying around)
Here are the steps I took to make a wood pallet headboard. Please note, these headboards are intended to fit a twin size mattress. Wood pallets actually are the perfect size for a twin bed. However, I often have company over so I made two and put them together to make a king size wood pallet headboard.
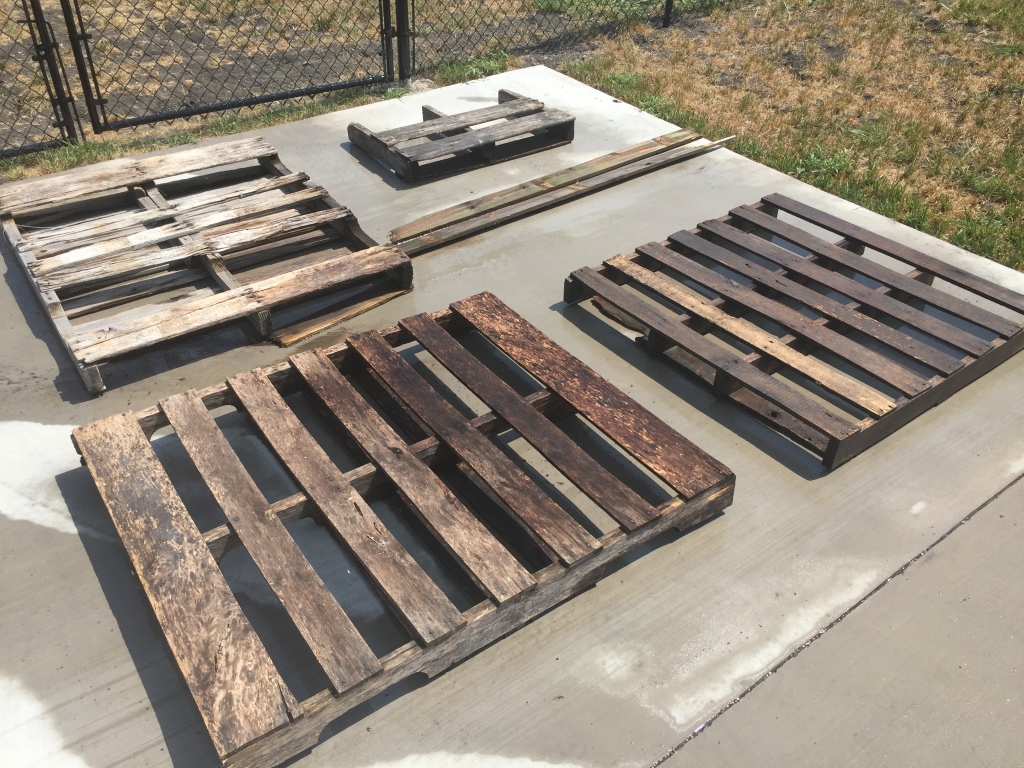
Step One: Wash off and disinfect (if needed) your wood pallets
Here’s a picture of how they originally looked when my son and I picked them up. They were in pretty rough shape but we hosed them off and got all of the dirt and mud off of the wood pallets. We also sprayed them down with mold remover because there were a few places that had mold and bugs on them. Then we left them outside to dry.
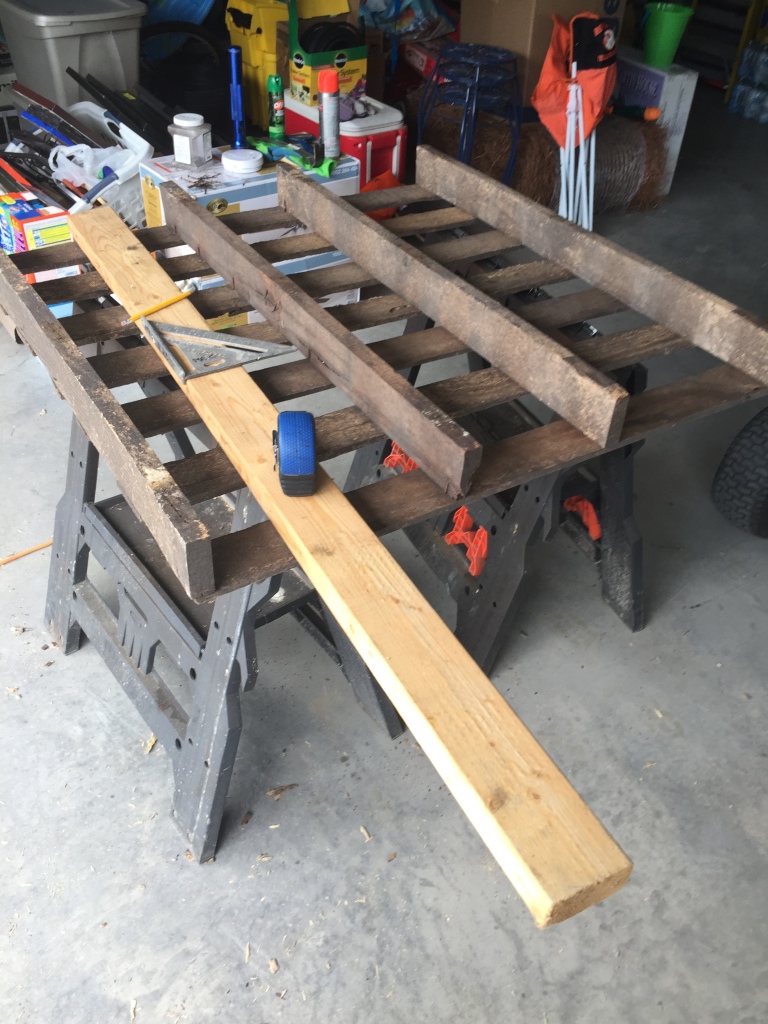
Step 2: Cut legs to mount to the wood pallets
Next, I took some left over 2x4s that we had in the garage. I then measured them and cut them down to use as legs. To get the height I needed to use, I measured all of the other headboards we had in the house and took the average height. The average total height for our headboards was 55 inches. So for my wood pallets I cut the 2x4s down to 20 inches high using my miter saw and left 7 inches showing at the bottom to lift the wood pallet up enough to hit the 55 inches that I wanted.
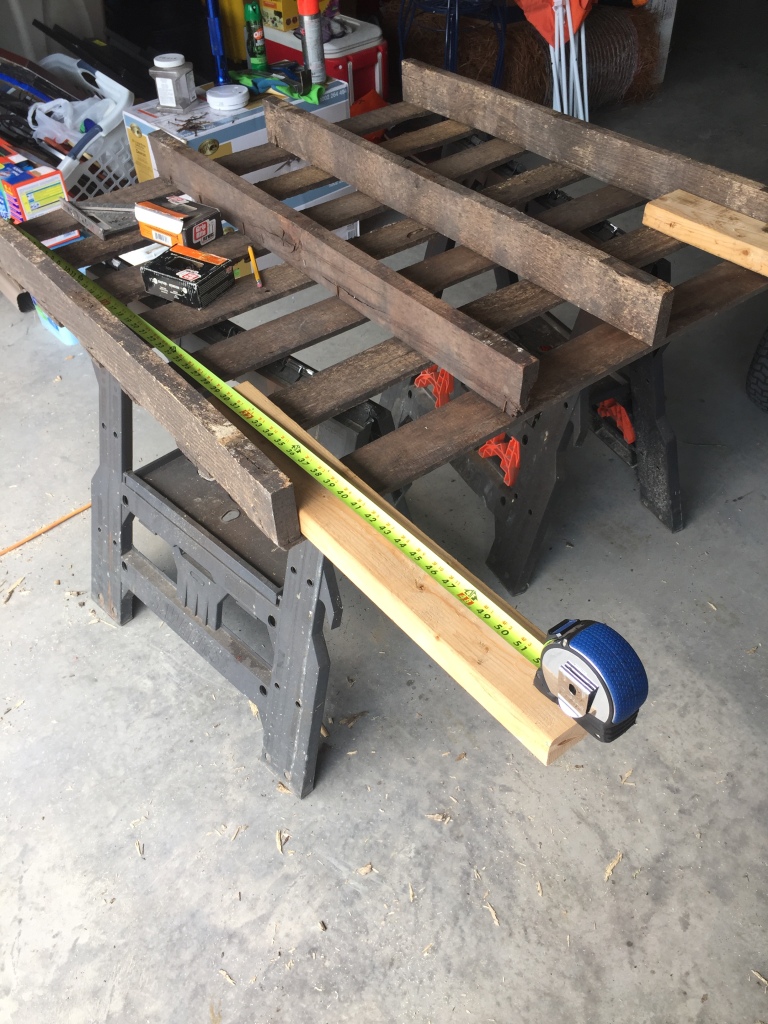
Step Three: Mount the legs to the wood pallets
After I cut the 2x4s down to 20 inches I played with the positioning to make it to where I didn’t go over 55 inches total in height. I then just used some screws that we already had and a power drill with the needed bit. Since this was going to be mounted on the inside of the wood pallet, I wasn’t too concerned about the “look” that the screws would leave.
Note: the placement of the 2x4s in the below picture is not where I ended up putting them. For my measurements, I left 7 inches of the leg showing at the bottom to get a total of 55 inches in height after the wood pallet measurement. Not all wood pallets are the same size so you’ll need to adjust your measurements to fit what you want. The final height of 55 inches is just what I wanted and nothing specifically told me it had to be that tall.
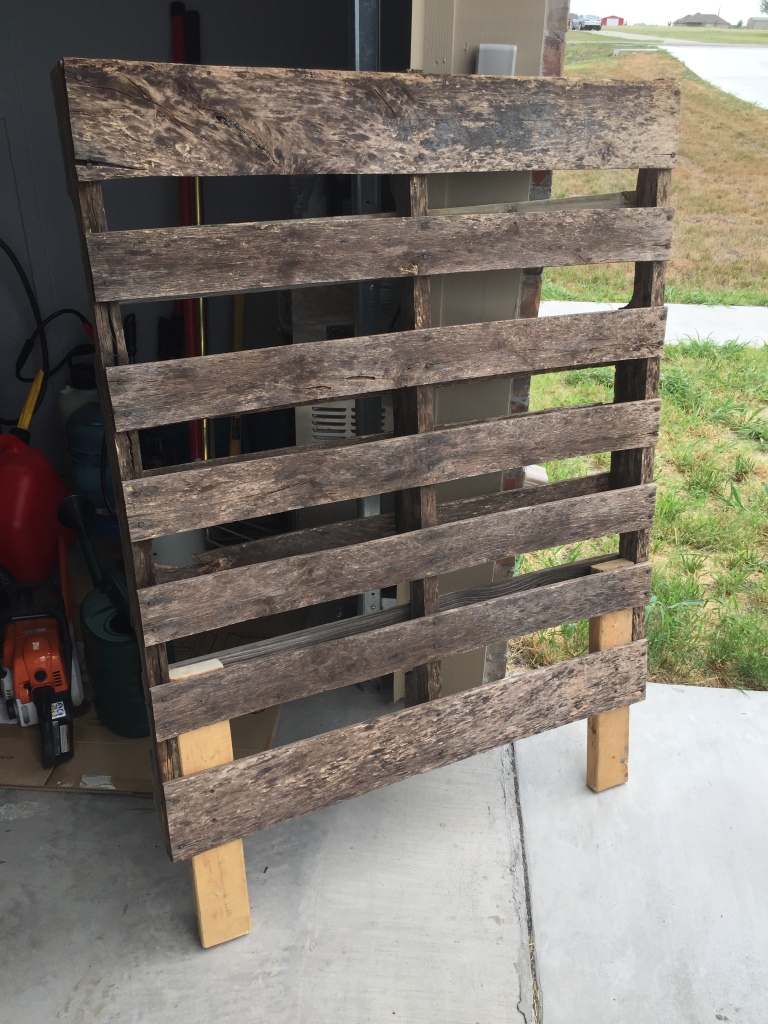
Below is a picture of how they looked after they were mounted onto the wood pallet. I LOVED how the wood pallet was “beat up” already. Honestly, it was almost a little too beat up in some places but I had four pallets to choose from so I picked the less banged up one. I also removed and replaced a few pieces, where needed, but nothing major. If it was warped, or bent, it stayed warped and bent. I wasn’t too picky because I knew I’d be painting them in some fashion. I just made sure nothing sharp or dangerous was sticking out because our kids would be around them.
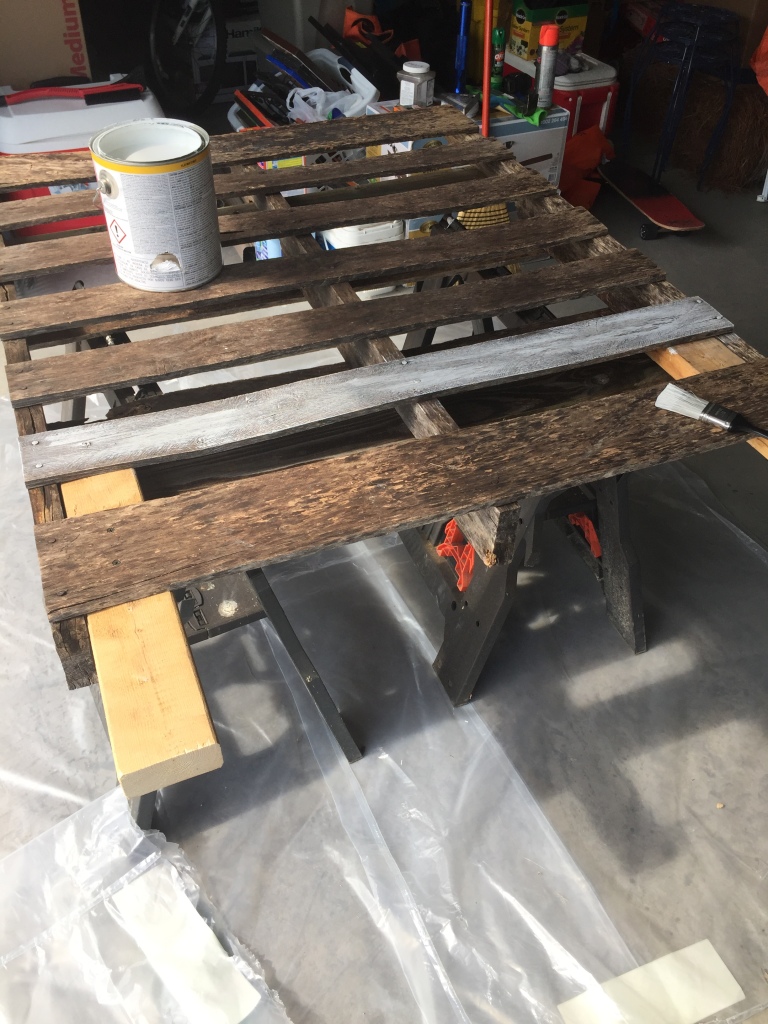
Step 4: Painting wood pallets
In regards to the color, I knew I didn’t want to leave the wood pallet in the condition that it was in but I wasn’t sure what color I wanted to paint them or what style to use. Thankfully, the wood pallets dictated everything that was going to happen to them anyway so I just listened. The reason why I say that is because when I tried to paint them, the wood pallet grain was so dominant that I would have needed to add coat after coat of paint which would take hours. Too many hours!
So I ended up using white paint because frankly, I had a gallon of white paint sitting around. It wasn’t anything special, just something I had left over from another project. So I used a regular 2 inch brush and started to paint. The moment I put the paint on the wood pallet, the pallet took over and showed me what it was going to accept. As you can see, I got a wonderful “white wash” finish without even trying. I just simply started with a little bit of paint and spread it out as far as I could make it go. I did this for two reasons. One I’m thrifty and don’t want to waste a lot of paint right of the bat and second, the less coats of paint the better because I have a job, two kids, a hubby and a dog…I don’t need to spend days and days painting something.
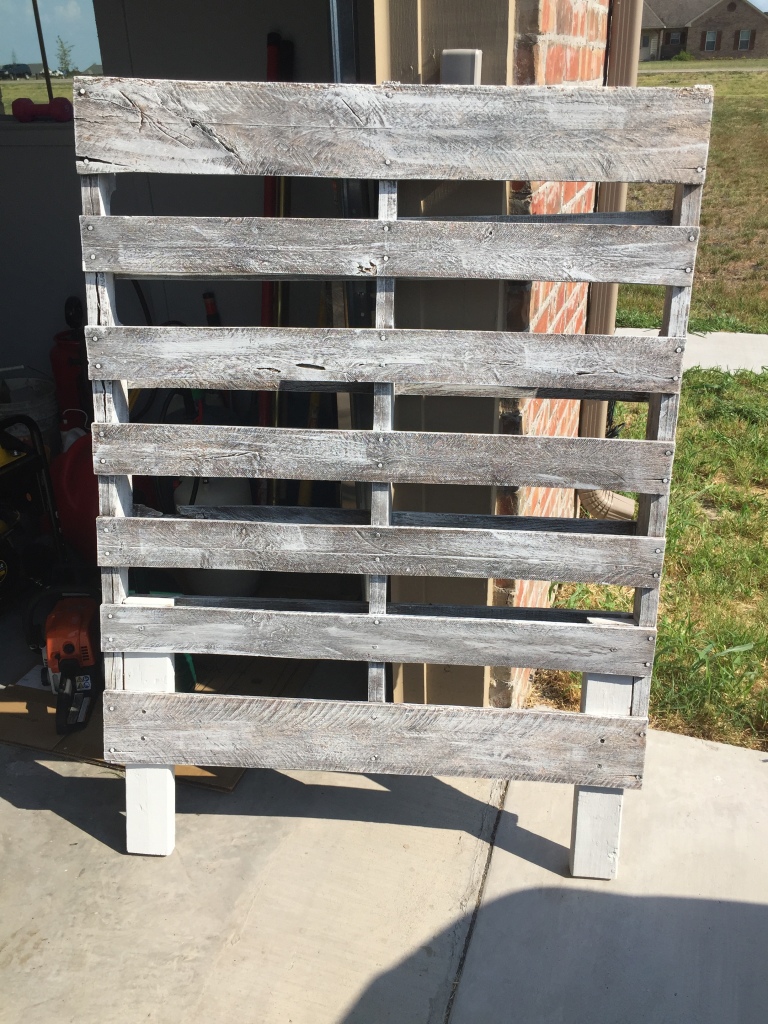
Step 5: Letting the wood pallet dry
After I painted all of the wood pallet (front, back and the legs) I set it out in the sun to fully dry. I wasn’t sure how much of the paint would absorb into the wood but I didn’t want to wait days to find that out either. It really didn’t take long at all because after a few hours it was fully dry.
Because the legs were 2x4s and not the same wood from the wood pallet they look a little different because they took the paint different but I honestly don’t care because they are going to be behind a bedframe.
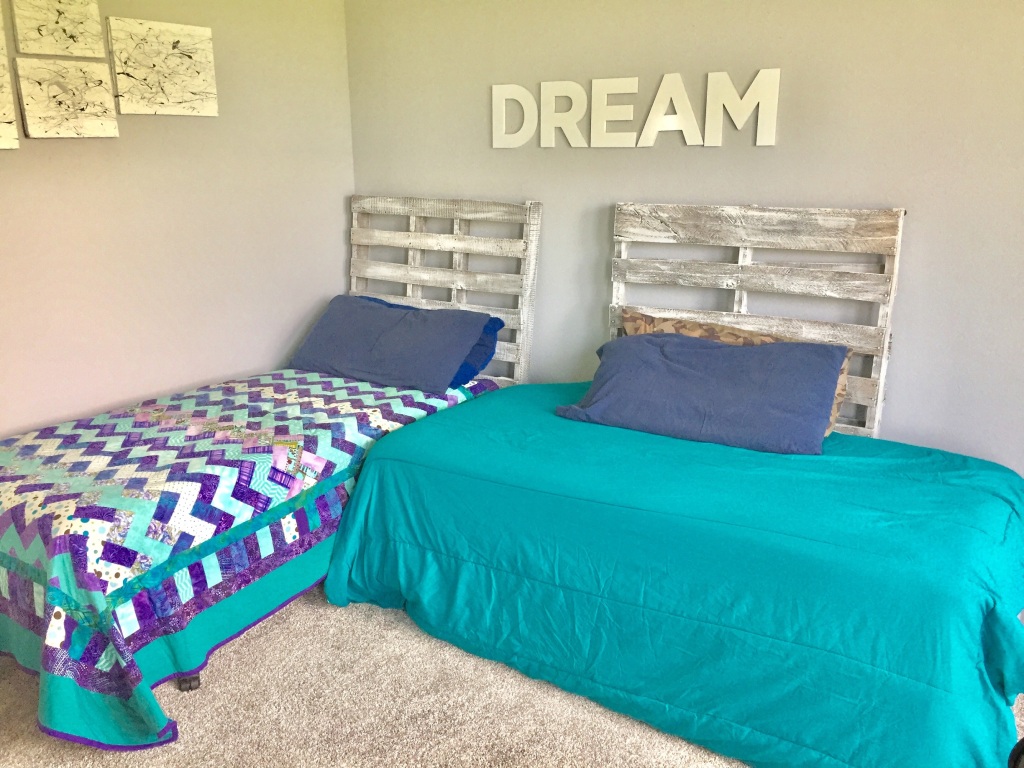
Step 6: Installing the wood pallet frames
Next, we placed them into our kids play room. As mentioned before I made two because we typically have family come stay with us. We also have another twin bed that we have in storage so whenever our family come to visit we just get it out of storage and set it up as a king size mattress with a mattress converter that we bought. In the meantime it acts as a great day bed for the kids to hangout on when they play their video games. I did end up installing large stick-on felt pads (the ones you use for the bottoms of chairs or on cabinet doors so they don’t bang) so that when they rested on the wall they didn’t damage it. I also didn’t connect them to the bed frames because I knew we’d be using them in different configurations. I just simply leaned them up against the wall with enough of an angle that they wouldn’t fall forward but not too much to where they would stick out too far.
Also, notice the two wood pallet headboards don’t match? I wasn’t concerned with it because honestly, no two wood pallets are going to match and I don’t have enough time in the day to find a free set that are exact. It just is what it is and I LOVE the outcome. We’ve had them for several years now and they’ve never let us down.
I hope you enjoy making your wood pallet headboards as much as I did. I probably spent under $10 making these if you count the cost of the materials we had bought previously and used on this project. If you have any questions or comments, let me know!
Note: I am an Amazon Associates member which means I get a small commission off of any sales that take place from the Amazon links that are provided.
Watch our wood pallet headboard tutorial on YouTube:
