
As you may know from my recent post, Wood Pallet Headboards, I am in love with wood pallets! They are cheap, easily sourced wood (meaning I can find them just about anywhere) and they hold up to the elements extremely well! Because of this feature I decided to use them for planter boxes. Now remember, I am not a carpenter nor am I a professional, these are just projects we’ve done around the house that we wanted to share.
First, I had two spots on my front porch that I knew would fit planter boxes very well. However, when I went to look to buy two, they were $45+ for one! That wasn’t going to cut it. So I had material left over from my headboard project and I decided to use it to make my own planter boxes.
Here’s what you’ll need:
- Wood Pallets – either one you found or bought. You could also used shiplap too!
- Skill saw & a miter saw with a wood cutting blade
- Wood stakes – 2×2 (they come in 6 packs at your local big box store)
- Cordless drill with appropriate bit
- Screws (any kind will do but they need to be at least 1 1/2 to 2 inches long)
- A nail gun would work but at the time I did this project I didn’t have one
- A flat surface to put everything together
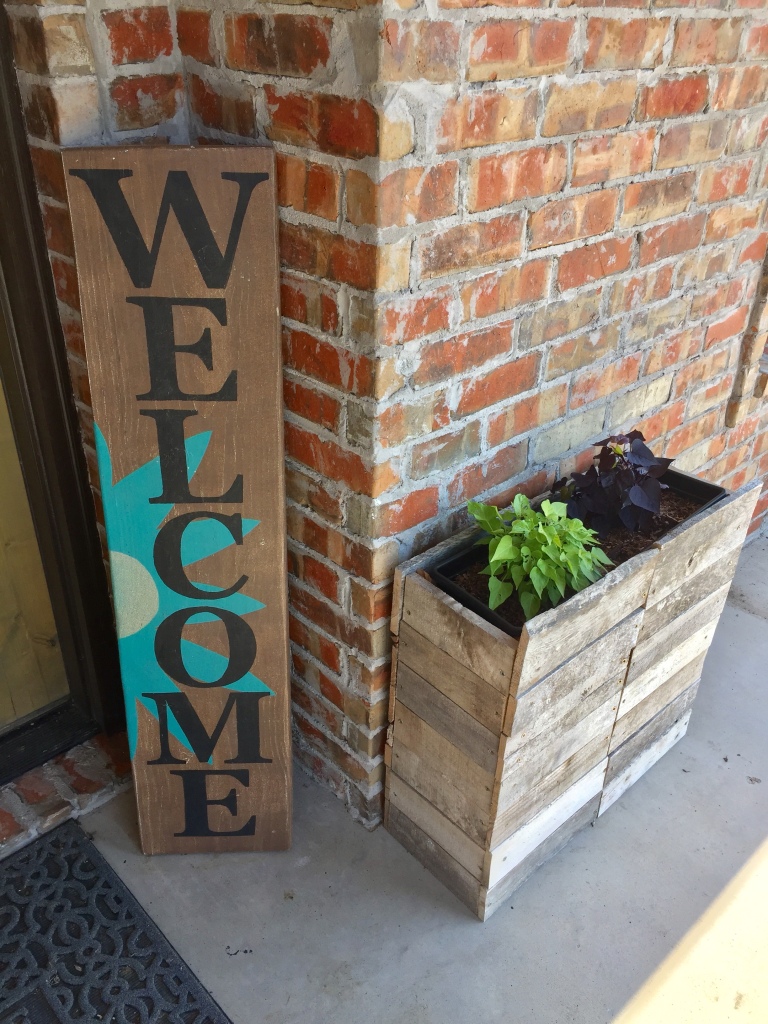
- A plastic planter box – you pick the size you want as they sell tons at the big box stores. I used two different kids. The first one was a black plastic window box that measured roughly 23 inches by 8 inches and another that measured 14 by 14.
- Then whatever materials you want to place inside. I choose potting soil and potato vine plants
If you don’t own the items needed to make this wood pallet planter box, there are links in the content below showing where you can purchase them.
Step One: Preparing Your Wood Pallet
Before you start any wood pallet project, I highly suggest cleaning them with either plain water to get the mud and muck off. I also suggest to use a disinfectant, especially if they have been sitting outside in the elements for a while. Any type of bleach will do or mold or mildew remover. If they are new and clean, you probably don’t need to do this.
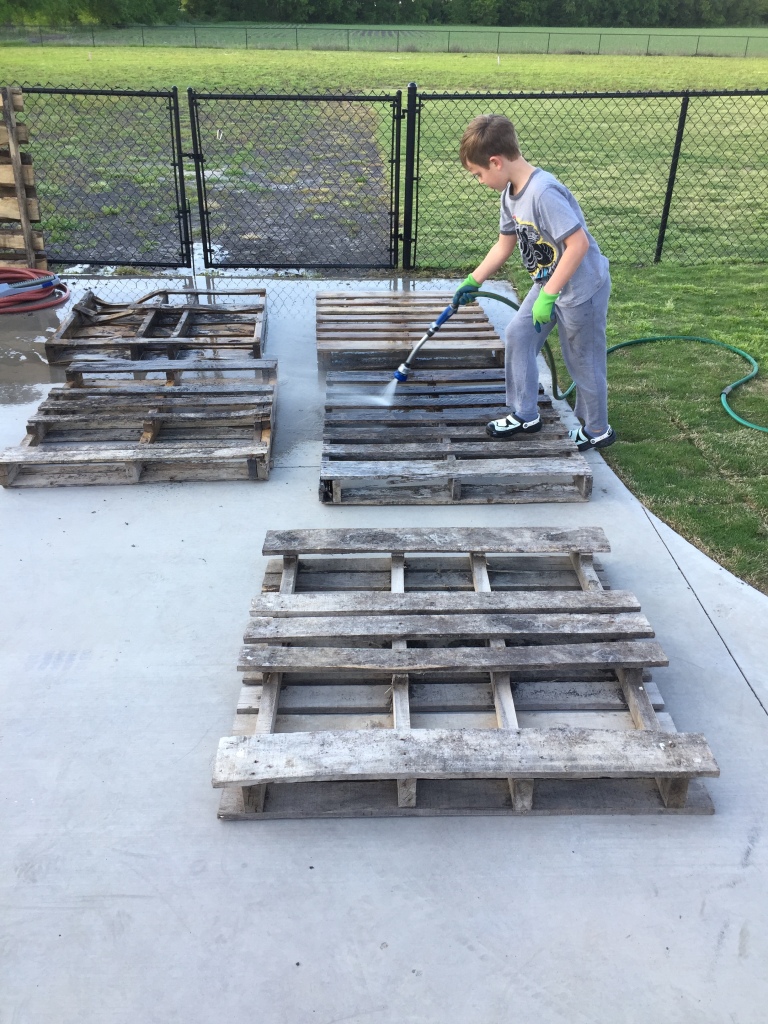
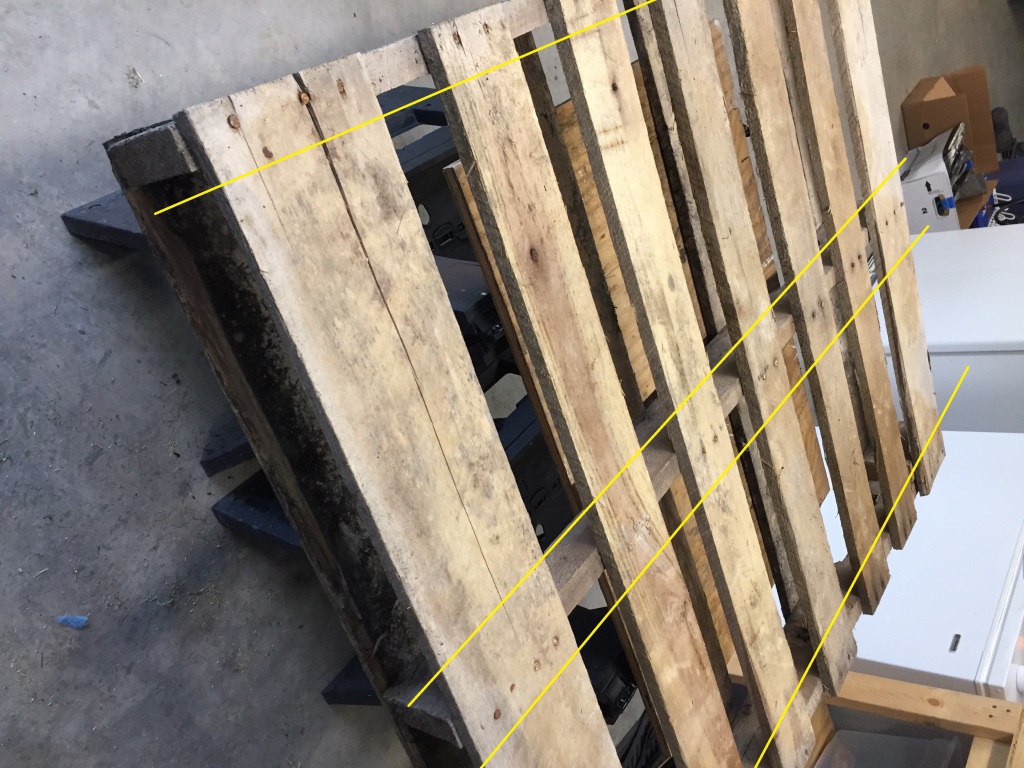
After you’ve cleaned off your wood pallets and let them dry, you’ll need to use a skill saw to deconstruct the wood pallets. I’ve tried in the past to pull the nails out or to use a crow bar/pry bar to get them apart in one piece but honestly, the effort it takes and the damage that is done isn’t worth it so I just cut the wood pallets apart with a skill saw.
**NOTE: PLEASE BE CAREFUL DURING THIS STEP OF CUTTING**
Below is a image showing roughly where I cut between the support pieces. Sorry it’s wonky, I can’t get it to load in the right direction! Ugh, the internets.
Step Two: Cutting Your Wood
Once you have your wood pallet cut down into manageable pieces, you then need to cut them to fit your plastic planter boxes. As mentioned, I have two. The first one is a square one that measures roughly 14 inches by 14 inches wide (about 8-10 inches deep). I know that I will have my wood stakes inside the planter box for support so I need to keep that in mind when I’m putting everything together. So to my dimensions I add one more inch on each side for the stakes and for the planter boxes to be able to all fit. I choose to make these planters roughly 24 inches tall which turned out to be about 6-7 wood pallet pieces on each side, depending on the size of each piece. I then cut each wood pallet piece down to 15 inches long with my miter saw. I also cut my wood stakes to match the 24 inch height.
**NOTE: PLEASE BE CAREFUL DURING THIS STEP OF CUTTING**
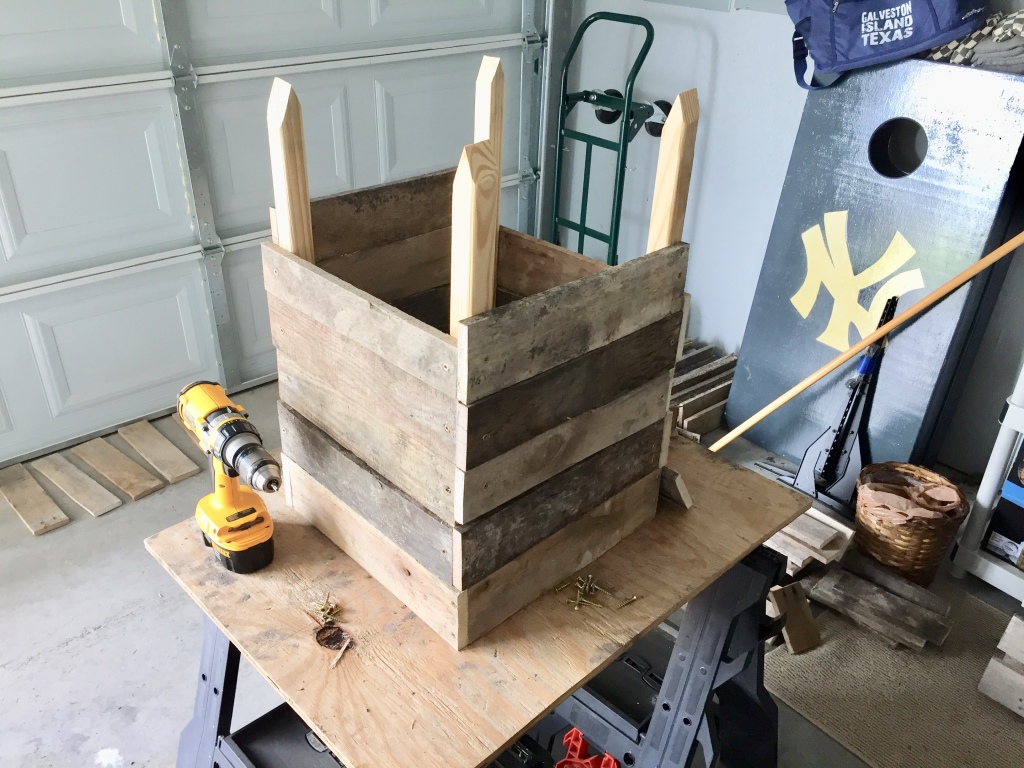
I then created a level surface with saw horses and a piece of plywood that I had laying around. Once I had a flat surface, I started from the bottom up. To create the structure I used an “inside/outside” pattern. I don’t know if that’s the technical term but it works for me! This means that I ran the pieces to where they would be on the inside edge of the stake at one side and going over the stake at the other side. That way all pieces would fit together and I didn’t have to cut one side smaller than another side. I wasn’t going to try and cut 45 degree angles and make it look fancy either! But you could if you wanted. I just didn’t have the time or the patience for all that jazz.
Below is an image of things coming together by using my power drill and screws. I ended up using two screws for each wood pallet slat. One on the right end and one on the left. You could use a nail gun as well to get a cleaner look. Also, it looks like the planter is upside down in the image but it’s actually not. I use the end tips of the wood stakes to give me more room to place my planter boxes and it gives me a little gap to remove them if needed.
As you can see, the pieces don’t all match up. That’s because you’re using a free wood pallet! If you want to go to the big box store and get actual slats, they would all line up. But I love how each piece has a different texture, color and grain. I specifically selected non-matching ones during the process to get that look.
Step Three: Finishing Your Wood Pallet Planter
You’re almost done! Once you’ve screwed (or nailed) everything together you can go ahead and place your planter box inside. I added my soil and potato vines before hand and I think it came out pretty good! (I can’t remember what the other plant is but the potato vine killed it anyway so…it’s a moot point lol)
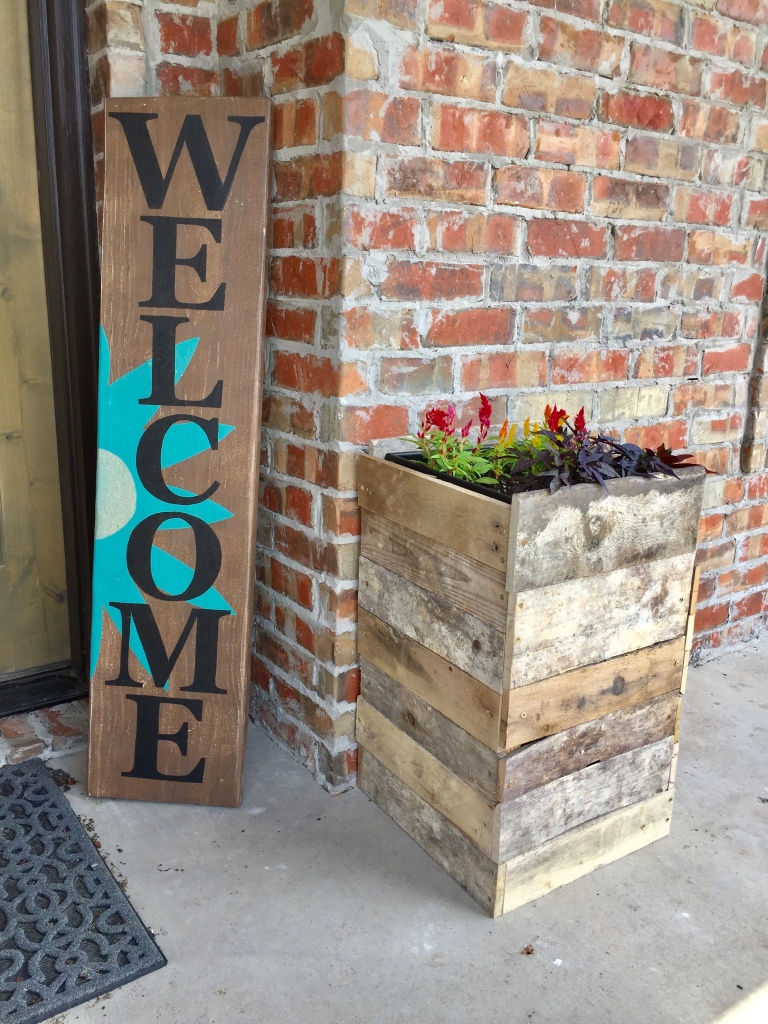
As you can see in the image below, I also made a rectangular one! The plastic planter box dimensions are roughly 23 inches long by 8 inches wide and about 6 inches deep. So since I cut my wood pallet up into more manageable sizes I had to use a row of two on the front. The front pieces were 13 inches long each and the side pieces were 9 inches each (like before I added one each to the length and width). I again made it about 24 inches tall which called for 12-14 pieces for the front and another 12-14 pieces for the back. The sides then needed 6-7 pieces for each side. Like before I used the “inside/outside” pattern so everything would line up. I had to use one more wood stake for the middle part of the front and the back too but otherwise it went together in a similar fashion as the first one with one screw being screwed into the wood stake on each end.
This was a really fun project to make and I hope you all enjoy it too! I think all in all it cost me about $30ish to make because I got the wood pallets for free. What cost me was the plastic planter boxes, the soil and the plants. If you had those items already it would be even cheaper!
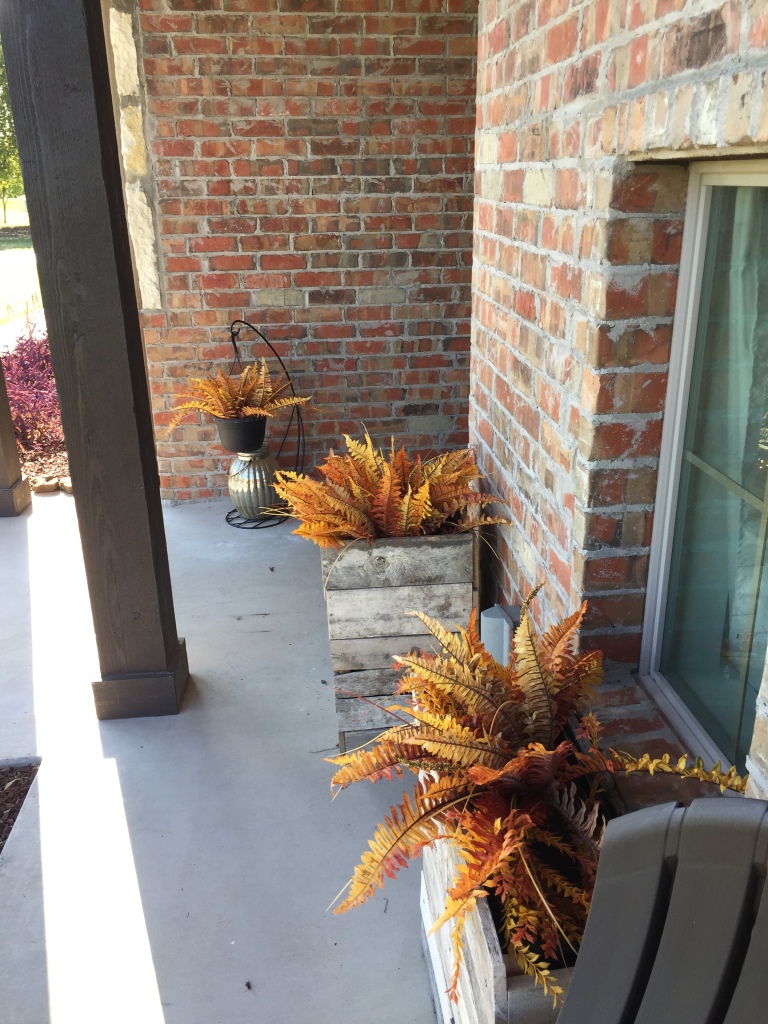
Pro Tip: I use these all year round! In the fall I swap out the annual plants for very colorful fall looking fake ferns that I bought on clearance from a home decor store. Or you could use perennials that would last longer too!
Leave a comment or a question and let me know what you think!!
Note: I am an Amazon Associates member which means I get a small commission off of any sales that take place from the Amazon links that are provided.
Check out our how-to video too!
