
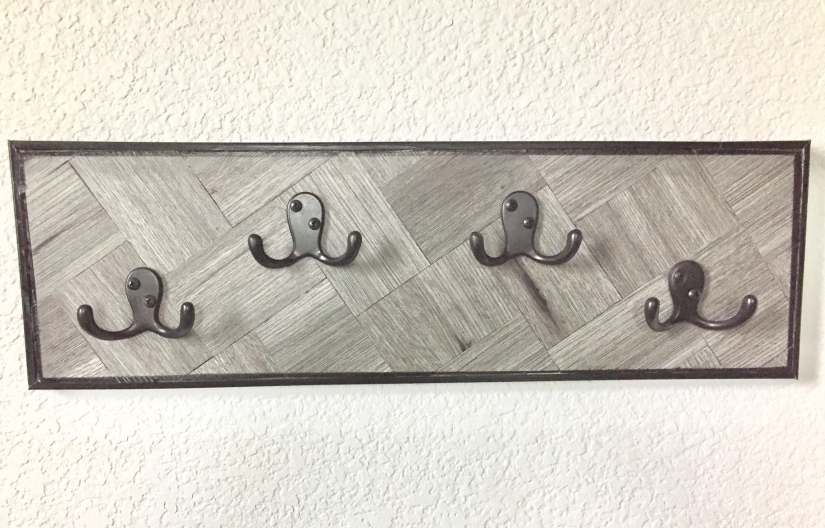
Hello! I’m so glad you checked in to see how we made our latest project: a towel hook out of leftover luxury vinyl planks!
When we were redoing our bathroom (I’ll be posting that story here soon!) we used a wonderful luxury vinyl plank (LVP) on the floor. However, just through the natural work process, you’re leftover with many scrap pieces that you can sometimes use for the floor but most of the time you can’t because the locking mechanism is on the wrong side or it’s broken, etc. So we had quite a few small pieces.
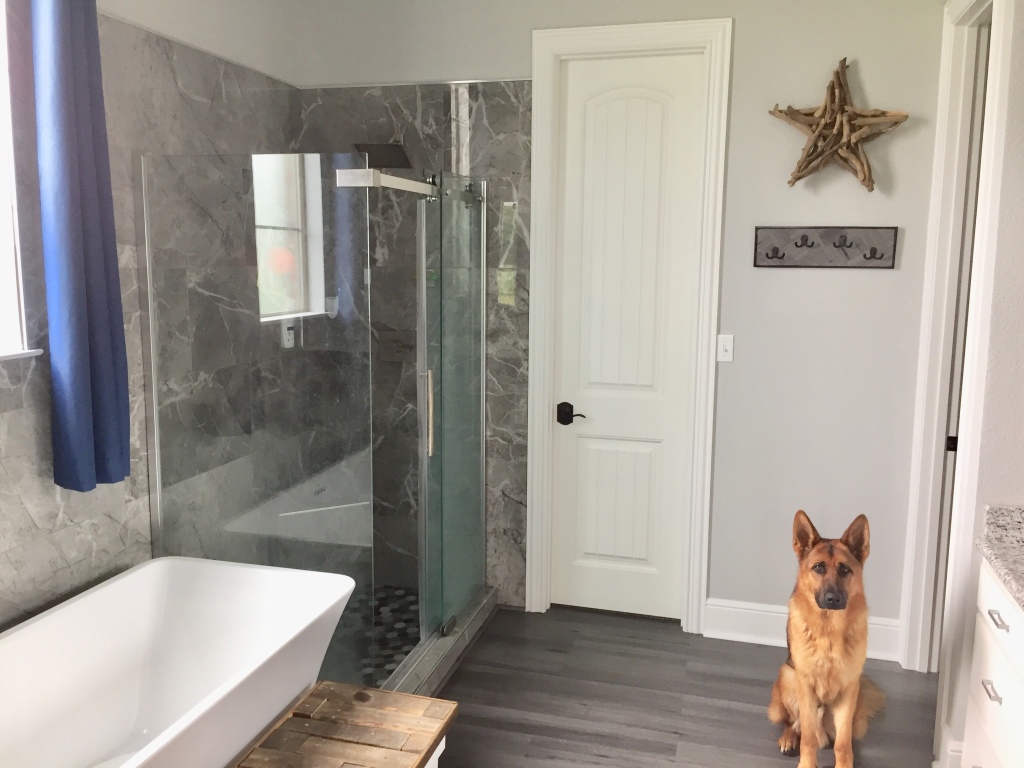
While we were finishing our work in the bathroom I noticed that we didn’t have a towel rack. Before we just hung the towels over the shower but now that we’ve installed a beautiful glass shower stall, we didn’t want to do that. So I came up with the idea of making a towel rack out of the leftover LVP. You can see the image of the finished product below. Now that I’ve gone through all of the trials and errors, I wanted to share the steps with you!
Here’s what you’ll Need:
- Luxury Vinyl Plank – any type will do (just make sure you adjust for the thickness if it does or doesn’t have a padding)
- Plywood – cut to the size that you would like the towel hook to be. I used plywood that was 3/4 of an inch and cut it down to 20 inches long by 6 inches wide.
- Trim – I used a 7/8th inch flat piece of trim that was rounded on the sides
- Miter saw, nail gun, power drill
- Paintable caulking, a level, wood glue, black spray paint, painters tape, vinyl tile cutter
- Coat/towel hooks and hanging hooks/wires
If you don’t own all of these items, there are links in the content below showing you where you can buy them.
Making the Pieces Fit
I knew from the beginning that I wanted to do a chevron type pattern with the pieces so I did some research to see exactly how they would be laid out on my plywood. After some trial and error I found that 2″ x 3″ pieces would be the perfect size and I could get a good amount of the pattern to show on my plywood board.
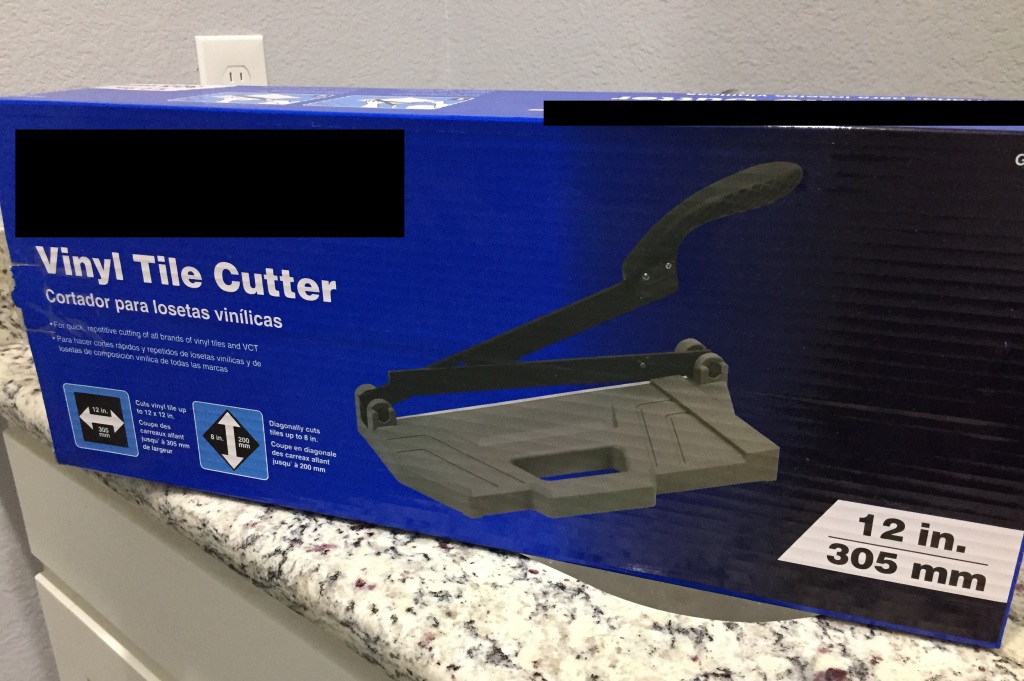
Pro tip: Using a vinyl tile cutter (pictured below) is the best way to get these cut down to the size that you need. I don’t have rights to show their product name in the image below but you can typically buy this cutter at any hardware store. You could also use a Roberts Vinyl Tile Cutter too. Also, when they are bigger pieces, you can use a miter saw but you must be very careful when using any sort of power tools. Either way, it’s not an exact science so I’ve come up with a way to get the cuts as close as you can but still getting the shape you want. Continue reading to learn how!
Before using the vinyl tile cutter, I had to layout my pieces the way that I wanted them. Unfortunately I deleted the picture I had with all of the pieces laid out before they were cut so I recreated it a bit with the image below. Just imagine all of these parts hanging off. I just used whatever I had that was small enough to slide under them so they wouldn’t keep falling off completely. Then I drew a line on top of the pieces, using a level and a red dry erase marker, representing the edge of my plywood piece. That in turn showed me where I needed to make my cuts. I also stuck little bits of tape on each of the pieces and numbered them, then took a picture (that I of course deleted…ggrrr!). I took a picture because I knew once I cut them, I’d need to know where each little piece went.
Once I cut them all down to size I then glued them to my plywood board using an all purpose glue that would adhere both the plastic on the back of my vinyl tile and the wood. You can use Gorilla Glue to get the job done. Just use it sparingly as this glue tends to expand when it dries.
Adding the Trim
Once I glued all of my pieces to the board, I then cut my 7/8ths in trim to fit all of the sides by using a miter saw. Our luxury vinyl plank was grey and black so I used a black spray paint on the trim to make a nice finished piece. I just used some black spray paint we had laying around but you could use Rust-Oleum spray paint. Once the pieces were dry I attached them to the plywood using my nail gun and the smallest nail the gun could take which was about 1 1/2 inches. Since the trim is pretty thin and small, make sure you set the gun to not shoot very deep, otherwise you will split the wood.
Making it Look Pretty
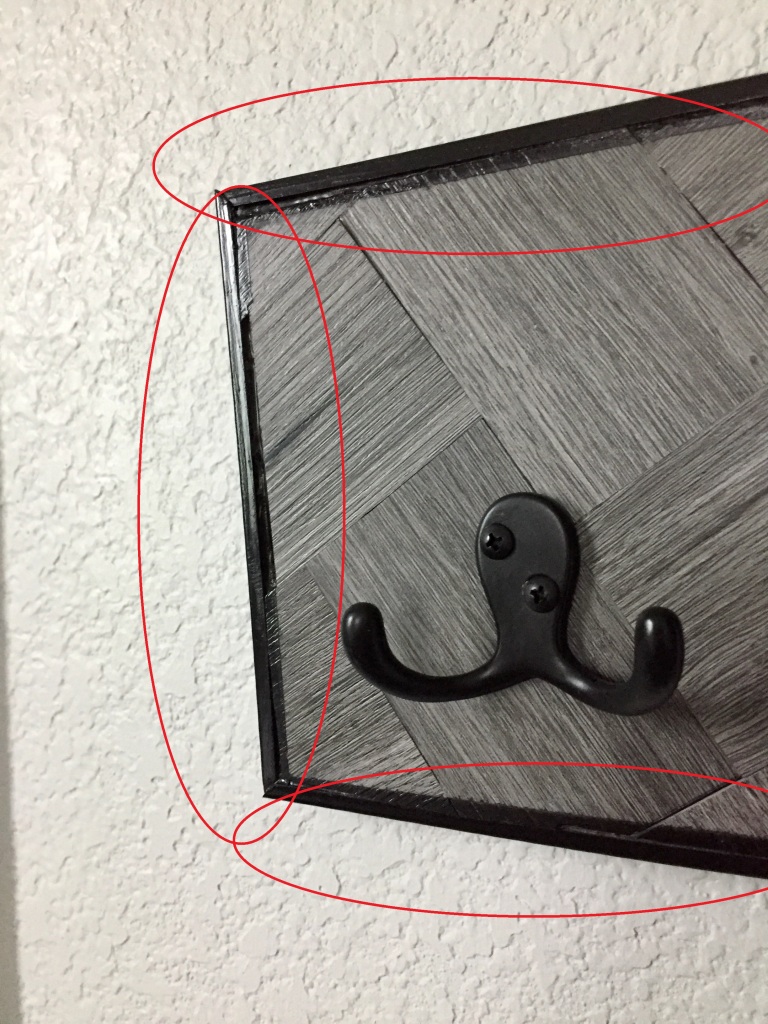
When you cut the vinyl pieces down they won’t be perfect. They will be either longer or shorter than what you actually want, because they’re not really made for this type of application or for being cut into small pieces. So you really just have to work with what you get. This is where the paintable caulk comes into play. I used GE Max Shield Painters Caulk as it was something we had leftover from another project.
Once I glued all of my pieces to the board and installed my trim, I then used the caulk in the areas that didn’t fully meet up. You can see in the image below where the gap is. This is why I chose to extend the black paint a little further onto the actual vinyl plank. I probably could have spent some more time using the caulking and filling in the gaps better but I really didn’t want to. lol
Even with the caulking you still have some gaps so I taped the entire inside area with painters tape. You can use Scotch Blue painters tape to complete this step. Once the area is fully taped, be sure and press down on all of the sides of blue tape. This will help make it to where your spray paint doesn’t creep under the tape. Once it dries you can remove the tape. If you get some that does creep under, use a utility knife (carefully) to scrape it away.
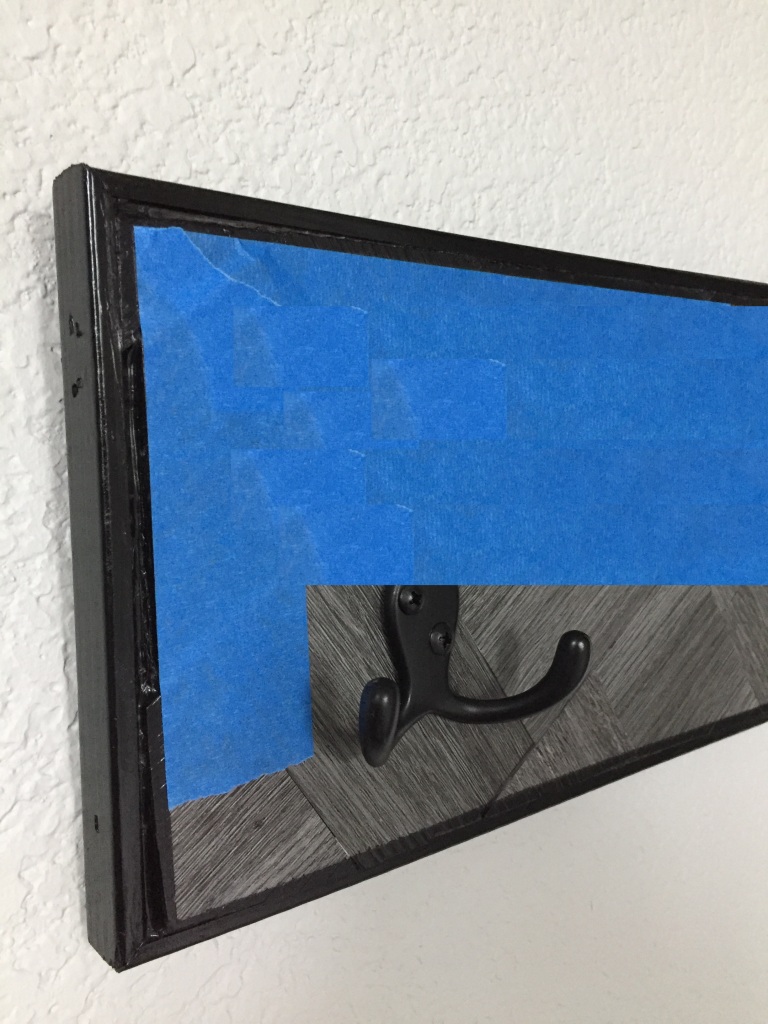
As a last step, I installed four coat hooks that we had laying around (I went through a hook phase when the kids were little, don’t ask!). These coat hooks are similar and I just spray painted them with the same black spray paint I used for the trim. I then installed them using my power drill. I could have pre-drilled the holes to make things easier but I didn’t. It took a little bit longer but it came out fine in the end.
All in all, this project was pretty easy to do. The most time consuming was figuring out the size of the pieces and the pattern. Once I got that done it was pretty smooth sailing. Also, painting the trim and just a little bit of the interior of the piece made the imperfections basically invisible.
I hope you enjoyed learning about how to make this towel hanger out of left over luxury vinyl plank pieces. If you have a comment or question, let me know!
Note: I am an Amazon Associates member which means I get a small commission off of any sales that take place from the Amazon links that are provided.
Check out our video!

Enjoyed. Nice coat hook rack.
LikeLike