
As you may know, I love wood pallets. Make anything out of wood pallets and I will more than likely buy it. My husband is probably sick of seeing them in the house AND in the shop but that’s just too bad. lol I love reusing them and adding the rough element look and feel to the pieces we already have in the house.
And talk about reusing and recycling! If you’ve ever driven past a job site that has products delivered on a wood pallet, they have more than what they know what to do with. It’s really a problem. I picked up the wood pallet for this project at the local big box store when we were pouring a sidewalk around our shop. So it was free!
Pro Tip: If you’re ever in need of a wood pallet and don’t have a place you can get one from, call the big box stores and ask them if you can have some of theirs. If you’ve ever driven behind those stores they have TONS and usually want to get rid of them anyway they can.
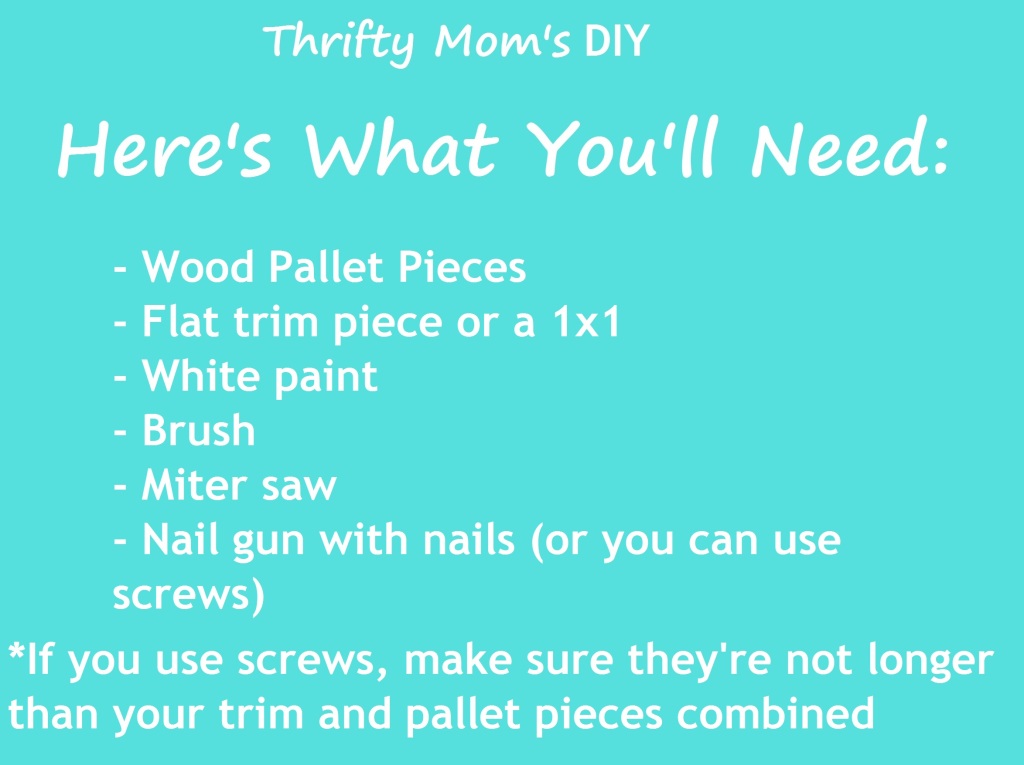
Here’s What You’ll Need
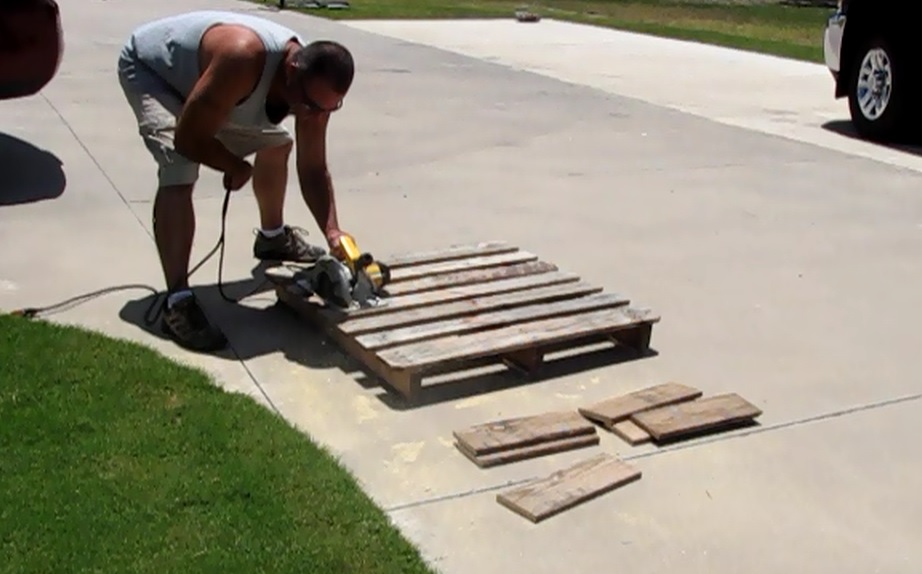
Step One: Cutting the Wood Pallet Down to Size
I get my wood pallet clock project started by cutting the pallet down into more manageable pieces. So I don’t waste time on measuring I just cut it as large as I can and then take the pieces that are closest to what I need. In this case I did 15 inches.
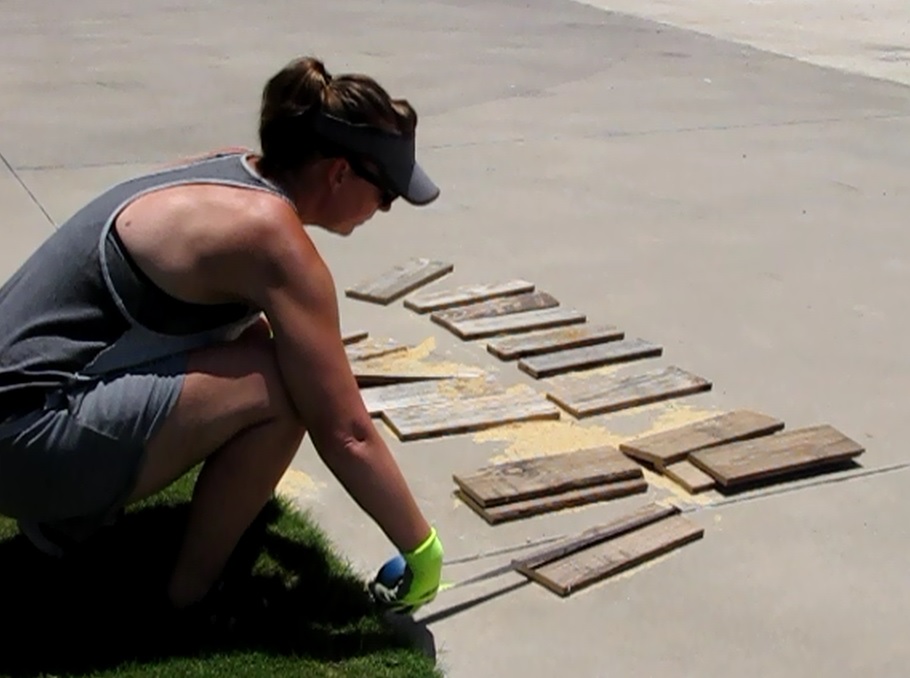
Step Two: Cutting the Smaller Pieces to Fit
For my wood pallet wall clock, I really only wanted three of the widest pieces I could fine so I ended up using a 15 inch long piece that was around 8 inches wide. Since the pallet was cut down to the biggest pieces it could be, most were already close to this size. I just picked the few that were the closest and moved ahead!
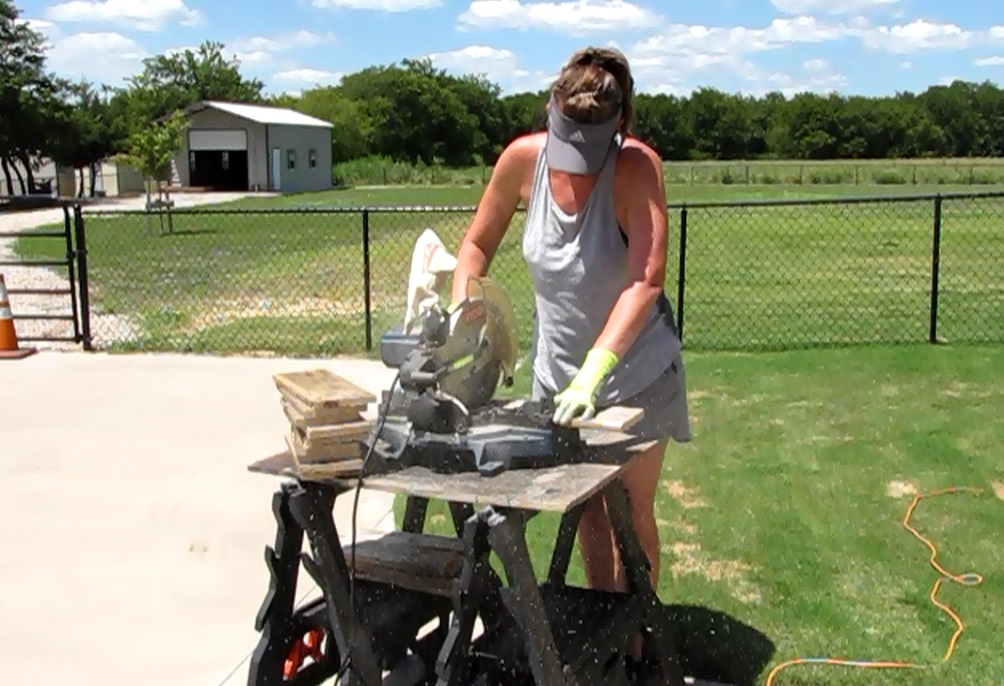
Once I get the ones that are closes to the size I need, I use a miter saw to cut them down to where they are all uniform. I also take my 3/8 trim pieces that I bought and cut those down as well. They will hold the three pieces of wood together. Since I’m using a nail gun, I ended up doubling up my trim pieces because I didn’t have a nail that was short enough.
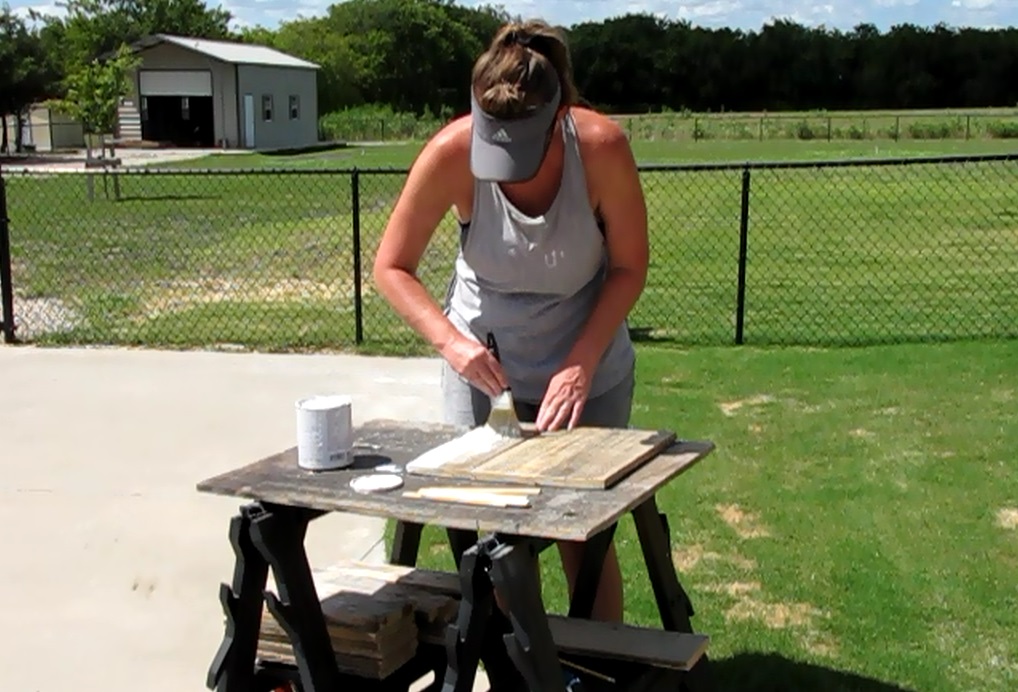
Step Three: Painting Your Wood Pallet Pieces
Once I had everything cut down, I went ahead and used some paint I already had in the garage. I wanted it to be bright white. I used it sparingly because I also wanted to see the wood grain and the rough texture of the wood pallet. If you apply the paint on too thick you can always sand it off once it dries.
Step Four: Creating the Wood Pallet Clock
Once everything dries I then start assembling the wood pallet. I use the 3/8 trim pieces on the back and nail them to each piece. As mentioned I had to double these up since I didn’t have a nail short enough. After that I used a speed square to mark where all of the numbers would go, starting with the 12, 3, 6 and 9 to give me sort of “land markers”.
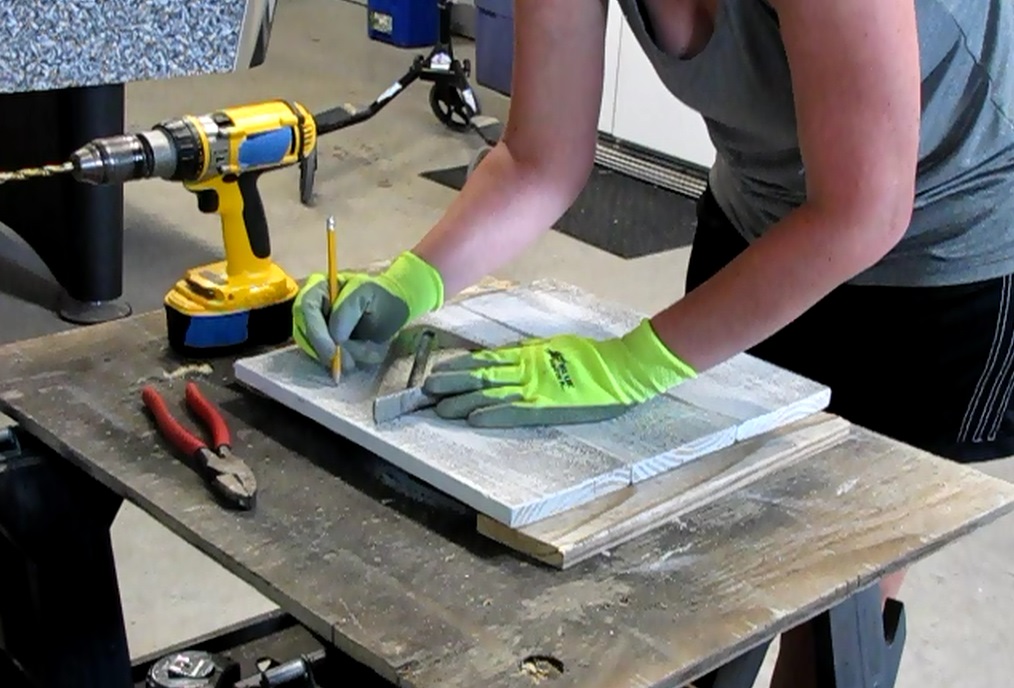
Pro Tip: Be as precise as you can be in this step because clocks are all about mathematics. If you’re off in your number marking your clock won’t tell the right time or it will consistently be fast or slow and you’ll need to reset it constantly.
Step Five: Painting Numbers on the Wall Clock
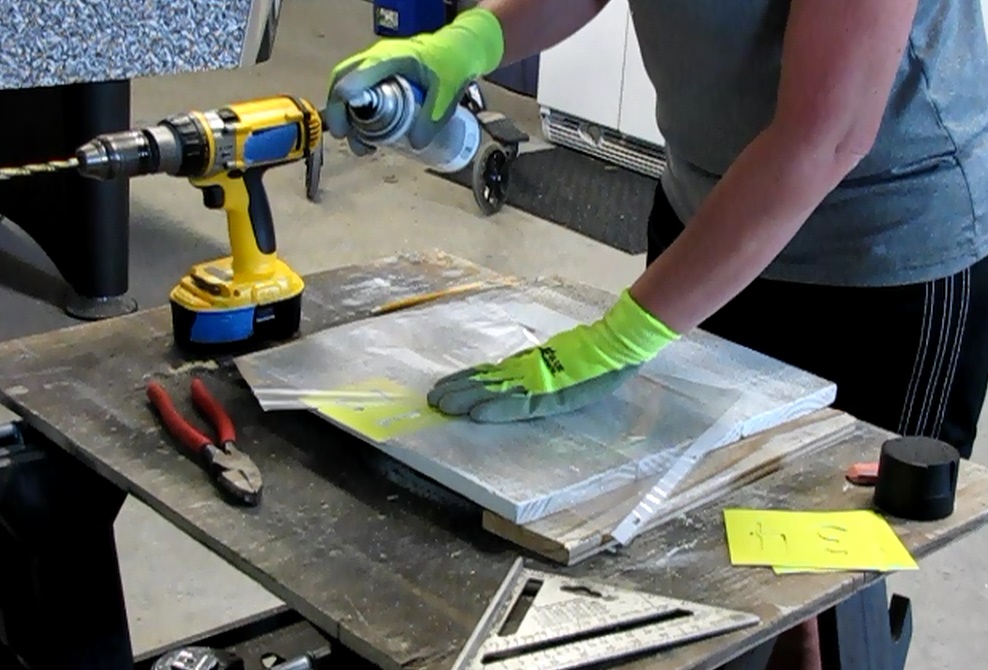
Now that I have the locations marked, I go ahead and use my stencils to place the numbers out. I used a few different methods until I became comfortable with the step but probably should have taped them down from the beginning. I say this because I had to go back and touch up some paint after I was finished.
Step Six: Adding the Clock Mechanism
One of the last steps is adding the clock mechanism. I bought this at the local craft store and was able to get a very stylish one to match my decor. It was easy to install with just a few steps including drilling a hole in the center of my clock and attaching the mechanism to the back of the clock.
Pro Tip: Be careful when you are attaching your clock mechanism. If you push the hands to hard on to the clock, you’ll put it onto the wrong timing loop and you won’t be able to use the clock properly. Follow instructions TO THE LETTER.
I had a ton of fun making this clock and received a lot of helpful hints and tips that made the project very memorable. It’s a great thing to be able to make something on your own!
Overall I saved at least $50 to $100 because if you try to buy a clock like this in any store it’s at least $50 if not $100 depending upon the size. The only thing I spent money on was the clock mechanism and the stencils. Other than that I had everything I needed.
If you have any comments, thoughts or suggestions, let me know by leaving a note below!
