The Thrifty Mom's DIY is built for those who want to do it all for not a lot of money. From home decor to functional updates and more, the Thrifty Mom's DIY is your go-to source for all things DIY.
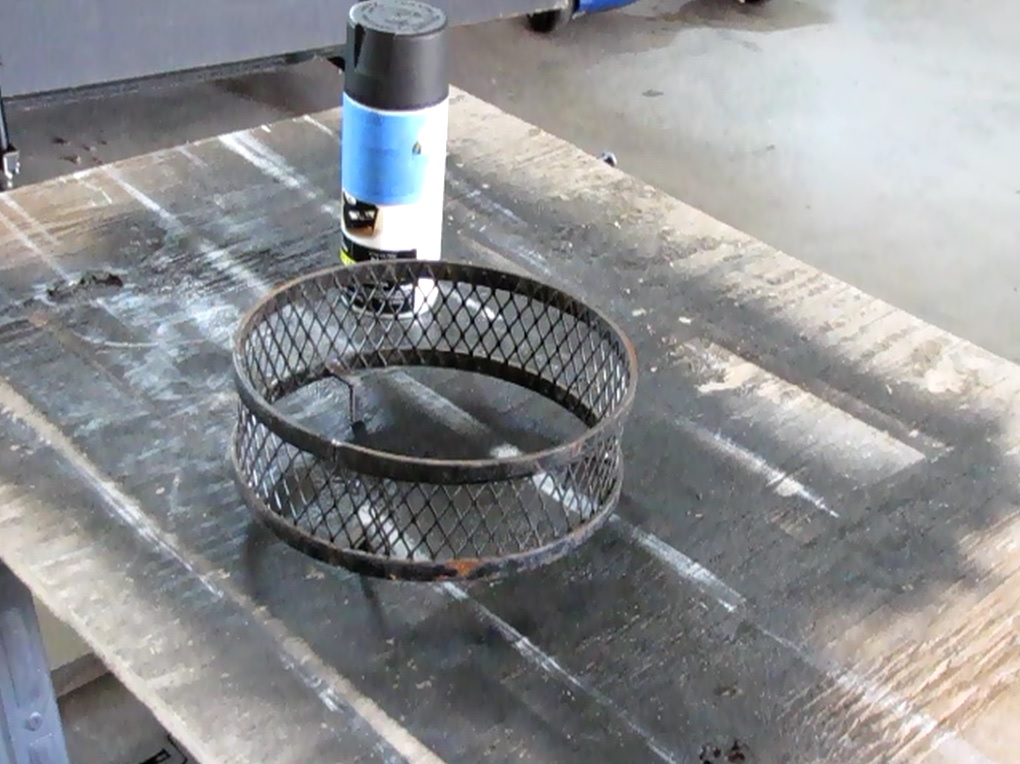
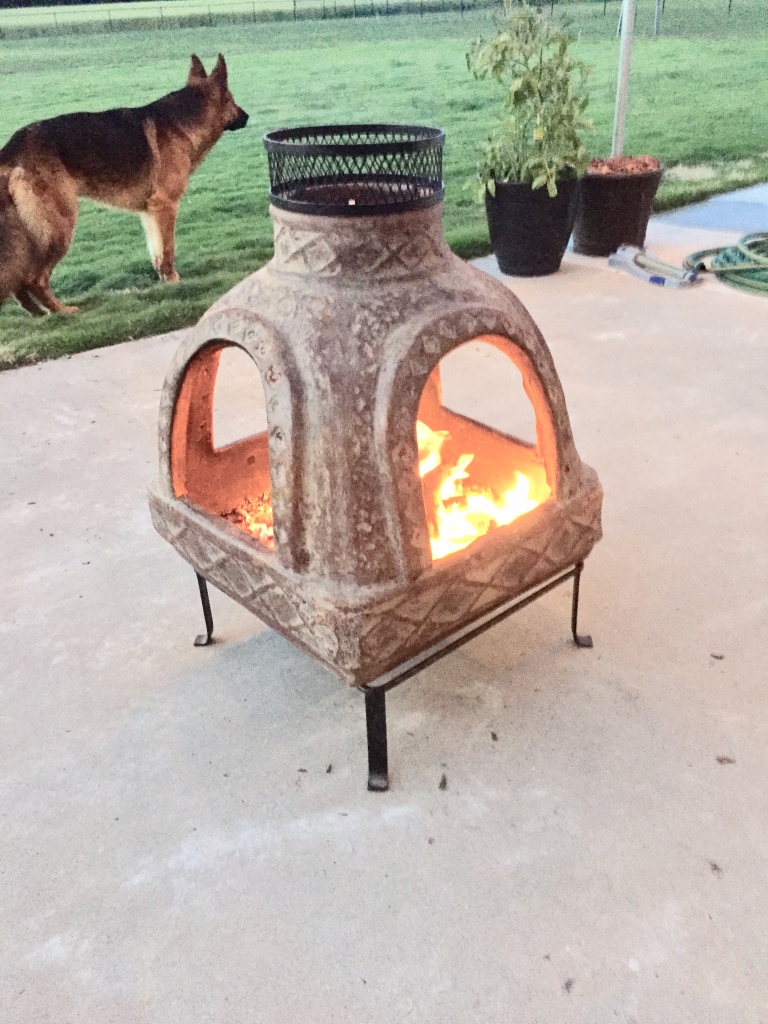
For Mother’s Day my family bought me a small chiminea for our patio. When we got it home I noticed that the metal pieces at the top were rusting a bit as it was sitting outside at our local nursery. After a few quick steps, I was able to take care of the rust and rust proof it so that it would last much longer.
What You Will Need
Rust proofing metal spray paint
Fine grit sand paper
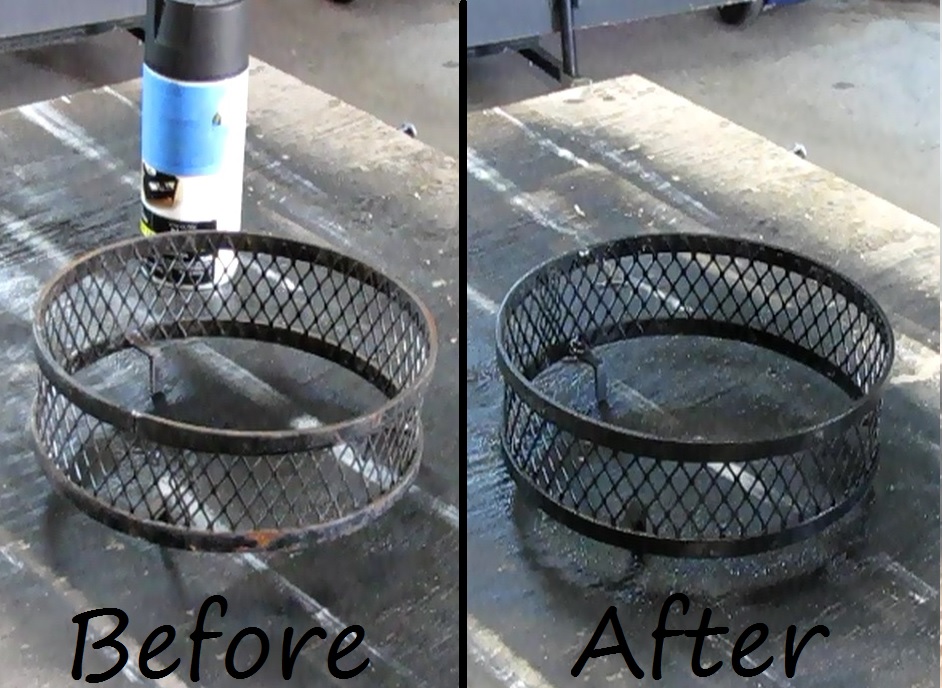
I went ahead and removed my metal pieces from the chiminea and in the garage I took my sand paper and started to gently sand the metal to get the current rust off of the metal. If I couldn’t get it all off, I just sanded it down to where any pieces that were sticking out were nice and smooth.
Once that was done, I took my spray paint that was made to cover metal and is good for either in door or outdoor, and started to spray. I sprayed the metal in short bursts to control the amount of spray paint that went on to the metal so I wouldn’t make the paint run. I then left it to dry for about 30 minutes and came back to check on the coverage. Spraying again the areas that needed it. I then left that to try as well and once it was finished, I placed it back on the chiminea.
Good Tip: If you are using this in an area where it might get very hot, like a chiminea, I suggest getting a high heat spray paint that can withstand the heat from the fire. It shouldn’t cost more than $10ish dollars at your local hardware or big box store.
After everything dried, I loved the overall look and really enjoyed the chiminea once it was all complete! The total cost was around $10 and would have cost much more if I tried to replace the metal, if I could have been able to find a replacement at all.
Hope you enjoyed this quick tip! Stay tuned for a short video showing you all of the steps and feel free to comment to let me know your experiences in DIY rust proofing!
Whether you have a full yard of dirt or you have just have some sports you need to fill in, laying sod isn’t something that is typically done every day or sometimes at all in the life of a homeowner. We’re here to show you how to do it yourself and save at least 50%, if not more, in installation costs! It’s not rocket science people, you can do it! And we’re here to help.
What You Will Need
Pallets of sod grass
Gloves
Sheet rock knife (aka Jab Saw)
Sprinklers (either in ground or manual ones)
When we first moved into our current house, it was a completely blank slate yard wise. Not a blade of grass to be seen. That’s because it was a brand new house and we negotiated the price down so the builder removed the landscape package to save money. Fine by me! That way I’ll know the type of grass that’s put in. Sometimes when you get those landscape packages from builders, it can be the bottom of the barrel grass. Not all the time, but sometimes. Here in Texas, grass is a luxury not a given. If you pick the wrong grass, it won’t stand up to the weather. We’ve got a great grass farm near by so we were able to chat with them about the different types.
Here in Texas, if you’re going to lay down sod, the best choice is Bermuda because it’s able to put up with such differences in weather from hot to cold from dry to wet. Texas has all of those, in abundance. In regards to the types of Bermuda grass, lets be honest, there are many different types. Those available to us are Tiff 419, Northbridge and Zoysia (Zoy-sha).
Good to Note: Different parts of the country have different types of sod grass. It’s best to check with your local grass farm to see which works best for your yard!
According to our local grass farm, Tiff 419, while a good Bermuda grass, won’t bounce back as well as the others if hit with extreme hot or cold temperatures or drought/excessive rain conditions. It will come back, but you may have grass that looks “dead” while it’s recovering.
Northbridge, which can be the same or just a little more in price than the Tiff 419 and will tolerate those extreme changes in temperatures and drought conditions a bit better. Meaning if you have a week of temperatures over 100 and you don’t water it, it will start to turn brown (as any grass would) but it won’t totally die on you and will return to it’s vigor in a quicker time. For Northbridge, and with Tiff 419 to be honest, the best bet is to make sure you water it as needed. Northbridge will also tolerate an overabundance of water as well without dying where the Tiff 419 may get waterlogged and won’t tolerate it as well.
Now to Zoysia (Zoy-sha). If you’ve ever watched the Masters golf tournament, you’ve seen Zoysia. It’s that green carpet looking grass that is green even in the winter. This is the Rolls-Royce of Bermuda grass and can cost twice as much as the Tiff 419 and Northbridge. But it’s worth it’s weight in gold, let me tell you. Zoysia can take anything you throw at it. Rain, no rain, sleet, hail, snow, hot temperatures, cold temperatures, you name it. We drive by the grass farm just about once a week as we’re coming home from our Saturday night date night and I swear to you, from January to December, you can tell where they have Zoysia planted because it is green almost all year long. It’s amazing.
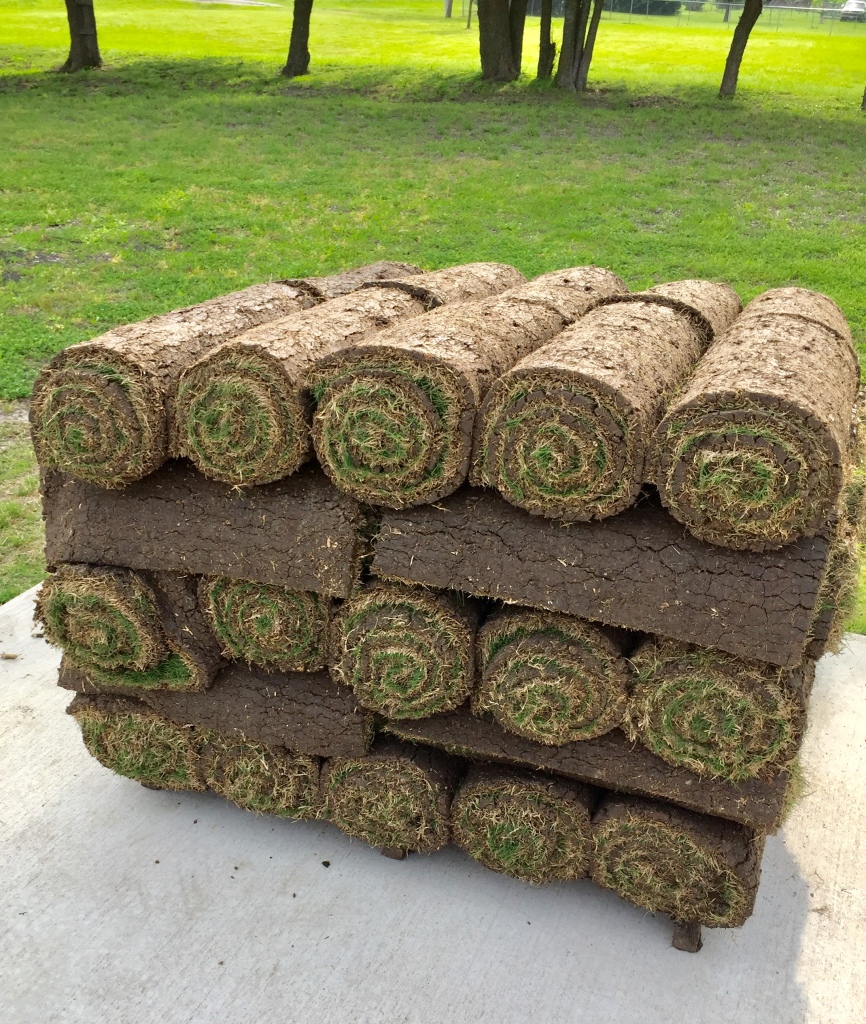
What are these prices you say? Well, pricing is going to vary between every grass farmer but you should expect to pay anywhere from $125-500 per pallet depending upon the type of Bermuda grass and the size of the pallet. Pallets range from 450-500 yards per pallet.
We received quotes for a company to put the grass down for us and quotes of what it would cost to do it out selves. As you can imagine, you save A LOT of money if you can do it yourself…close to 50% if not more.
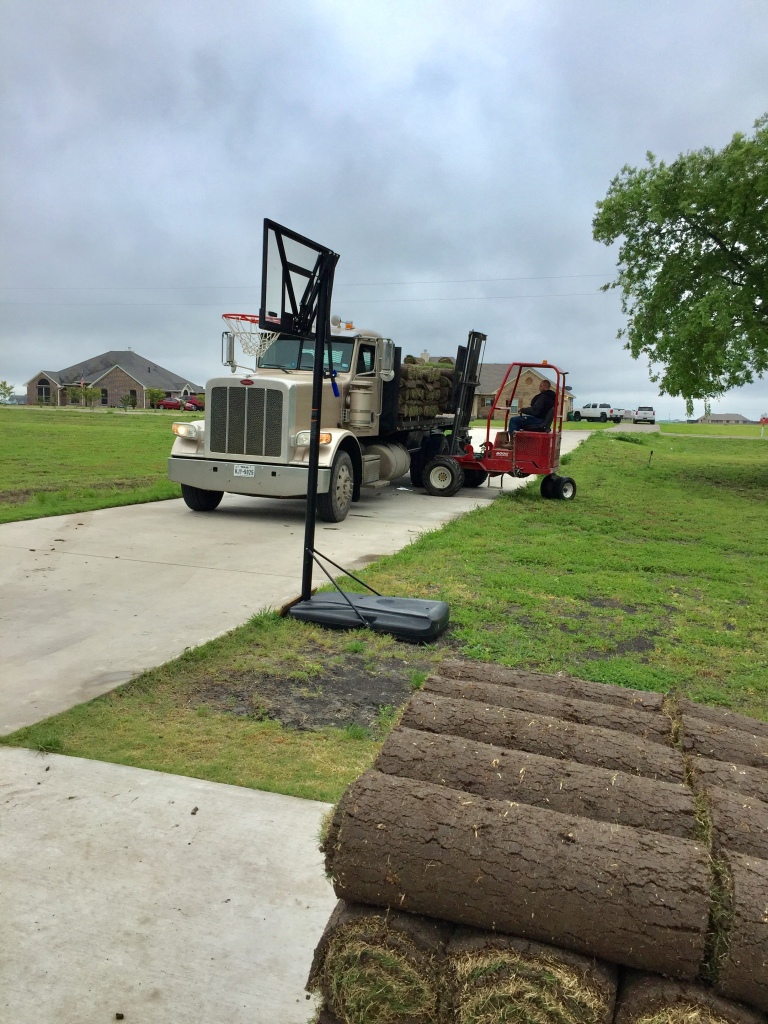
For us, we went the middle of the road and chose the Northbridge. We ended up getting 16 pallets at around $220 per pallet at 450 square feet each. They also delivered it for us for about $65. That was well worth it. We’ve since ordered several more smaller orders and we’ve never been let down! Overall the cost for the 16 pallets was about $3,500. If we would have had a company install it for us, we would have gotten less grass for more money. In this case, about only 75% of what we wanted for $7,500. It was a no brainier to do it ourselves.
Massive tip: The best time of year to lay sod is in the spring. If you lay it after that you are fighting with one hundred different things from heat, lack of or too much rain, weeds that are in it’s rampant growing stage, etc. Also, the grass itself is braced for the weather, not for cutting and the weather, so it can take a bit for it to bounce back if you lay it outside of the spring time period. This is another thing to consider when wondering which type you want to get.
Step One: What to do First
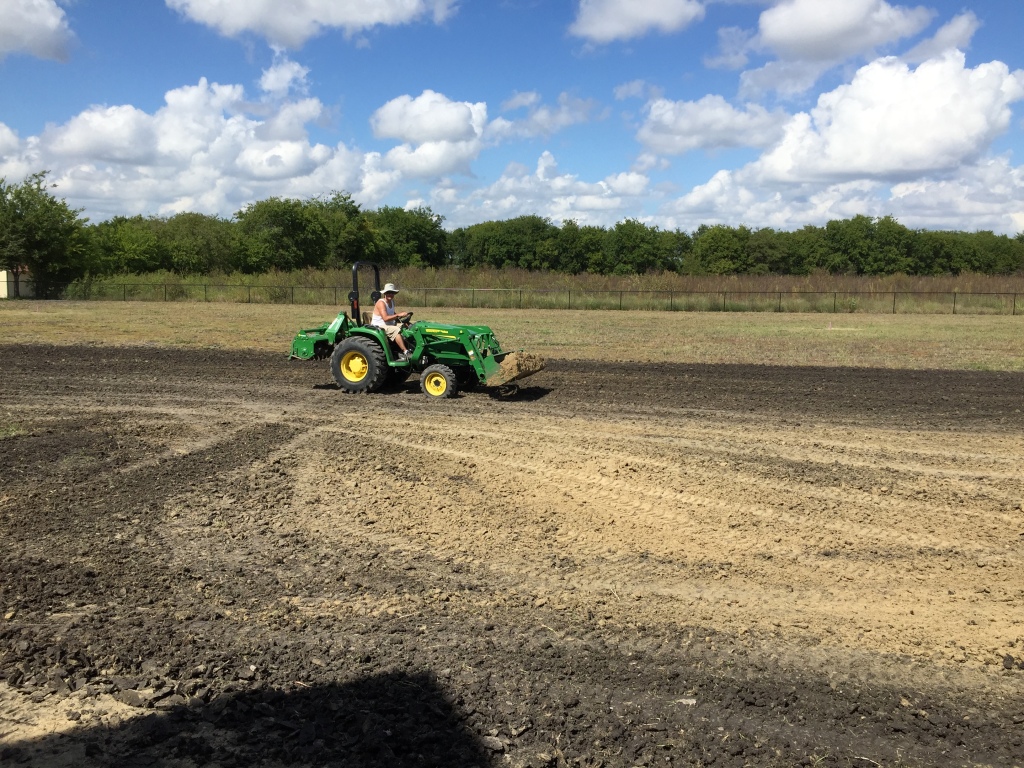
Depending upon who you ask, you may have different opinions on what should be done first to prepare your yard for laying down sod. Some may say you need to till up all of the dirt, others may say you need to add a top soil over all of it, some say to spray it to kill the weeds, some say nothing.
We had nothing but acres of weeds during our first run of putting down sod (literally acres of weeds), so we decided to rent a small tractor with a tiller and till up all of the weeds. Knowing what I know now, if you have mostly dirt with weeds, the sod pieces are so thick, you can just mow the weeds down as low as you can go and place the sod right on top and call it a day. The sod pieces are so thick (or they should be) that they will literally smother the weeds underneath and kill them. So no need for a top soil, no need for tilling or spraying. I really would not recommend killing the weeds with a weed killer spray. That will make your soil toxic and can harm the brand new sod you’ll be putting down.
Full disclosure, we are not landscape experts, we’re just do it yourself homeowners with some experience. We also hire a turf company to come out and spray the yard once a month for weed control during the summer months, then once in the fall and spring. BUT remember, let your crew know you have new grass so they can spray accordingly. Applying any type of lawn maintenance to sod that’s just been cut and laid could damage it because it might get a double dose of fertilizer. Your landscape crew, if told, should know how to handle the grass that’s less established.
Step Two: Laying Down the Sod
Once you’d prepared your base (or not) you’re ready to lay down the sod.
Steps to layout sod:
Pick up sod
Lay it on the ground
Pick up sod
Lay it on the ground
Rinse and repeat, times 100,000
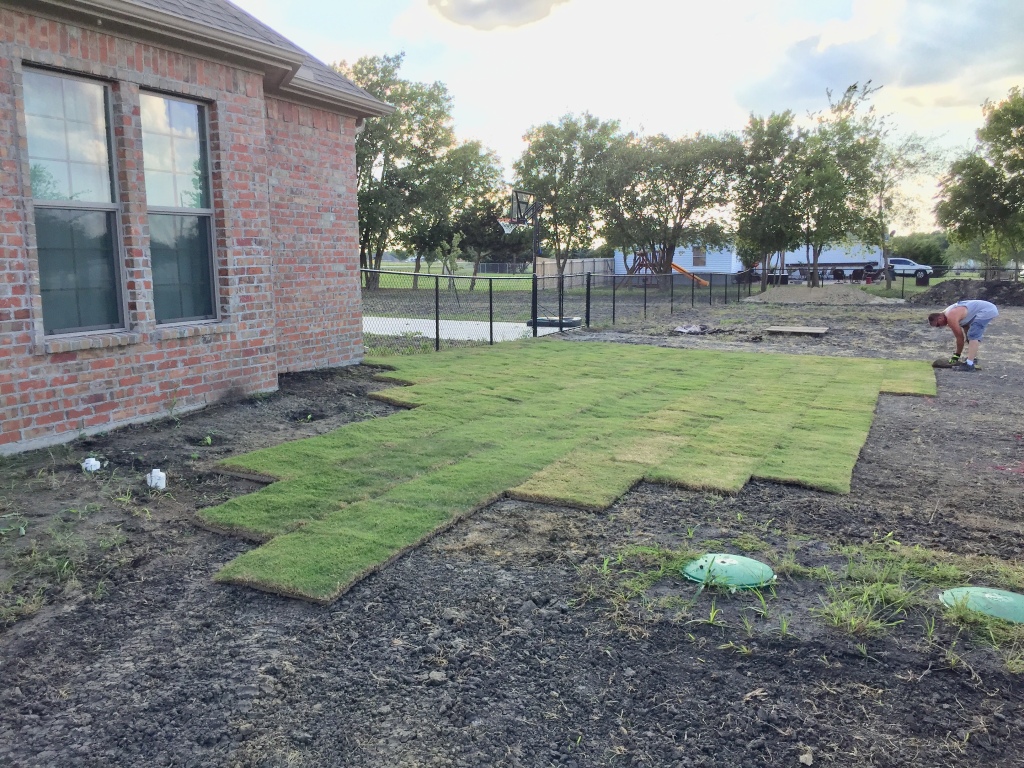
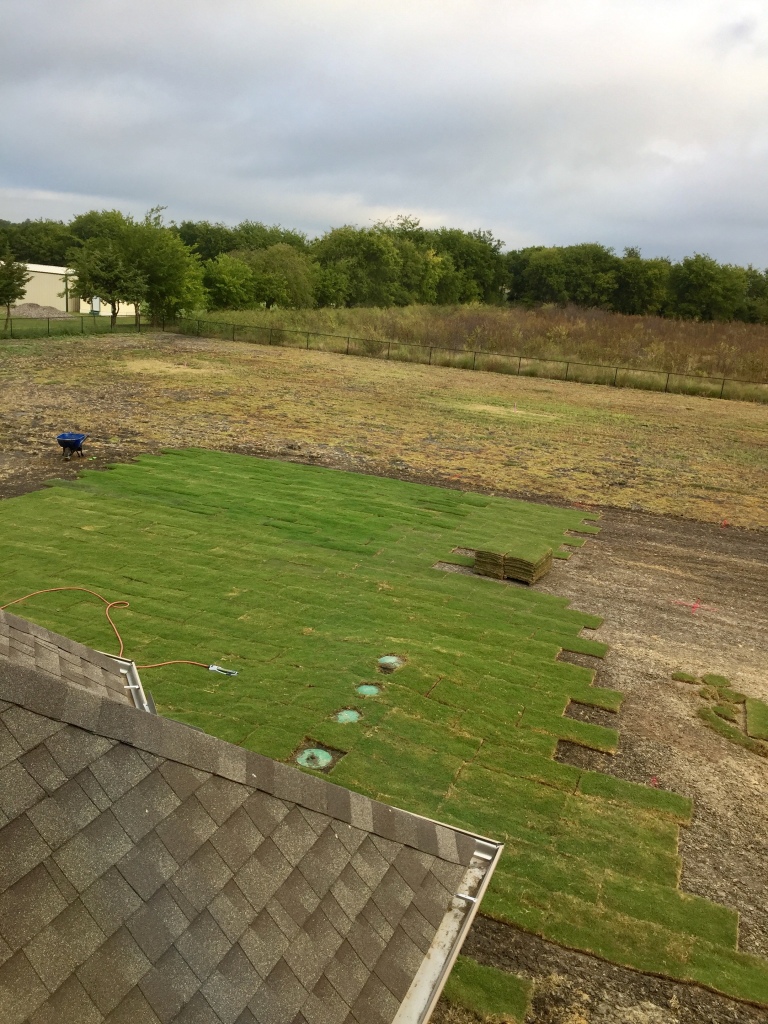
Laying down sod is ridiculously easy, it’s just more laborious than anything else. Grass sod can also come in a variety of sizes from 2×4 feet pieces to 1×2 feet pieces. And I’m sure other grass farmers will cut them in different ways. The thing to know is that you can request them to be cut in a certain way. Why does this matter you say? Well, after a few pieces it doesn’t matter but after hundreds to thousands of pieces, it really really does. I have some back and stomach muscle issues so the 1×2 feet pieces are perfect for me because they are lighter and easier to manage. If you don’t have those issues, you can really knock out some square footage with the bigger pieces but know this, they will be heavy! Those 2×4 feet pieces, even when dry, will weight at least 40-45 pounds. If they’re wet, goodnight, they will been even heavier than that! The 1×2 feet pieces, even our kids were able to help which made the job even quicker. Granted I didn’t do those the first time but still, it’s good to know.
Once you start laying down your sod, you need to just keep going. Putting one end on the other. It’s not like flooring to where you have to square off and make it a perfectly straight line before you start. It’s not rocket science either. Just lay those suckers down. They will grow into each other making all of your planning for perfectness, unnecessary. The best bet is to just start at one point and keep going. If you get to a point where you need to cut your grass to make it fit, we’ve found that a sheet rock knife (aka jab saw) will do wonders for you. It takes a little elbow grease but you can cut the pieces exactly how you need them. Like butta!
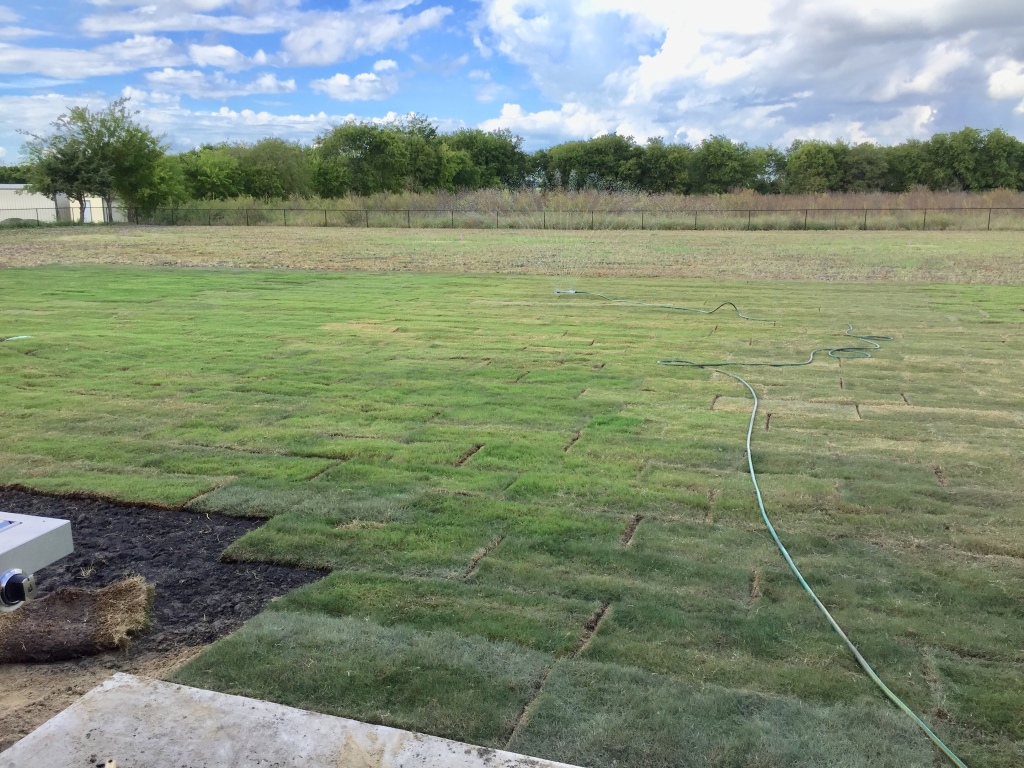
The biggest tip I can give you once you are finished laying down your sod is to water, water, water! You will lose your grass quicker than anything if you do not water it right after it’s installed. Sure it’s resilient, but after it’s cut, it’s in what’s called a “trauma” stage. It’s traumatized from being cut from the ground and will pull back to protect itself. It is more susceptible to dying than ever before in this stage!!
We do not have an in-ground sprinkler system so we use the old tried and true oscillating sprinkler. It’s some work but if it keeps the grass alive, so I’m all for it. The best tip I can give you is to make sure you water your sod every day for the first week for at least 10-15 minutes in each section. Then after the first week you should be able to drop down to every other day watering. This all depends upon what time of year you put down your sod and your current weather conditions, but either way, watering should be a major element of your care, after installation.
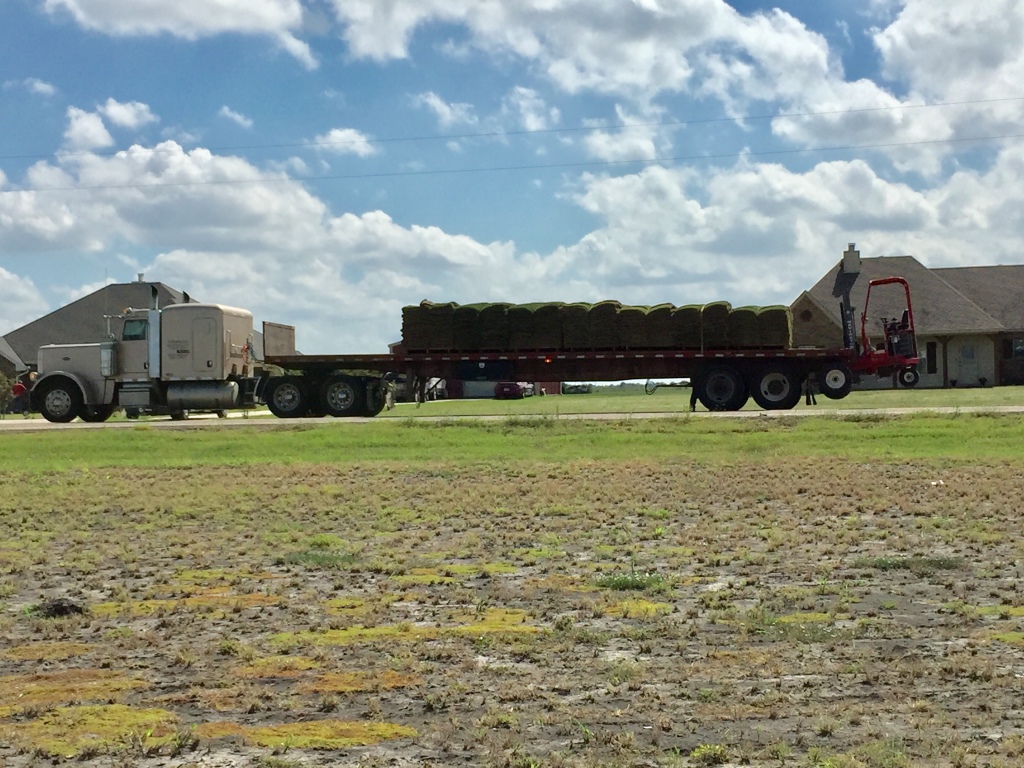
To put down 16 pallets of grass, that were about 450 square feet each, it took us at least three full days, morning, noon, and night. We’ve picked up one pallet here and there and just a few weeks ago put six more pallets down. That took about three days as well but that was because my husband had to work and the kids had school so it was just me during the day and my husband and I at night. I forgot to tell the grass farm to cut them in smaller pieces so it was rough. But we got it finished!
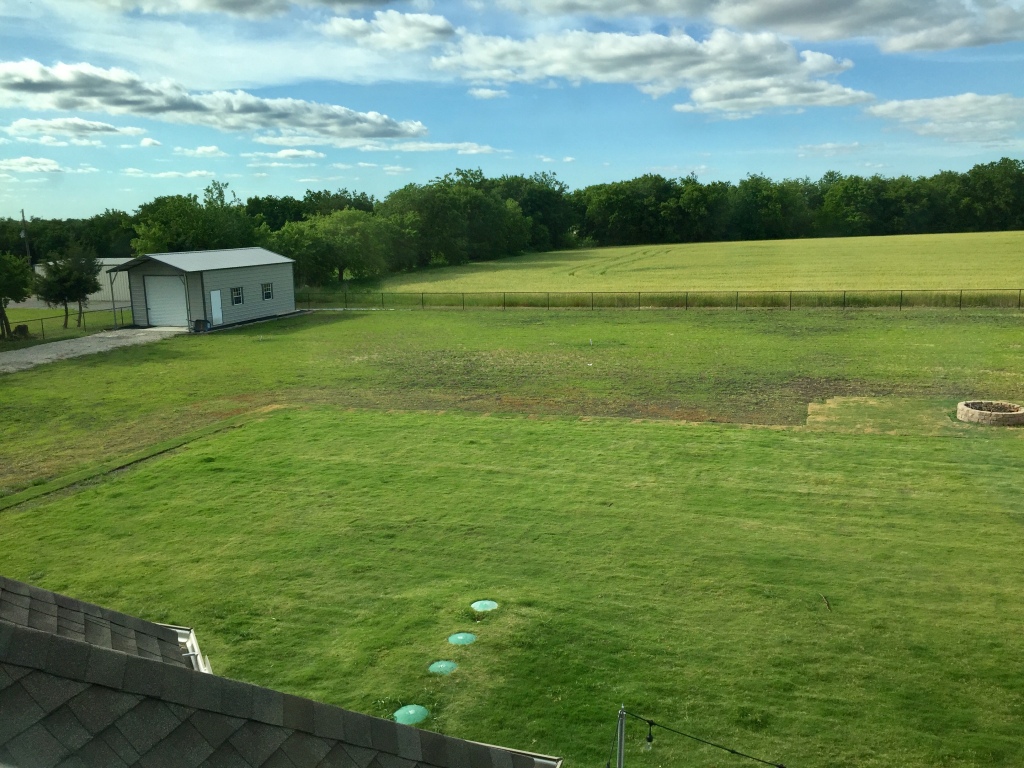
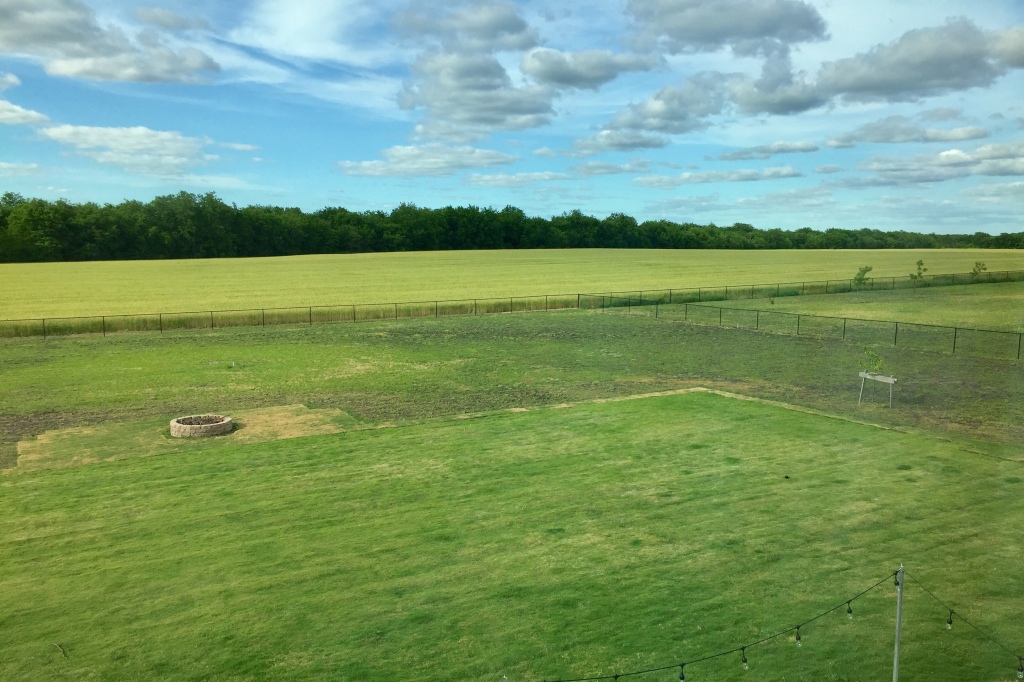
UPDATE: Here is an image of the grass about 2 years later! We’ve had to water it several times as the weather got hotter but it’s been fantastic. We added a fire pit and just put grass down around it. Loving it!
I hope this helps you with your sod grass project! Please share, or leave a comment if you have any questions! We’d love to hear from you. Stay tuned for a short video showing you some fun time lapse video.